


Creative Team Member, Miki, shows us how she emphasizes her journaling using WordTransfers.
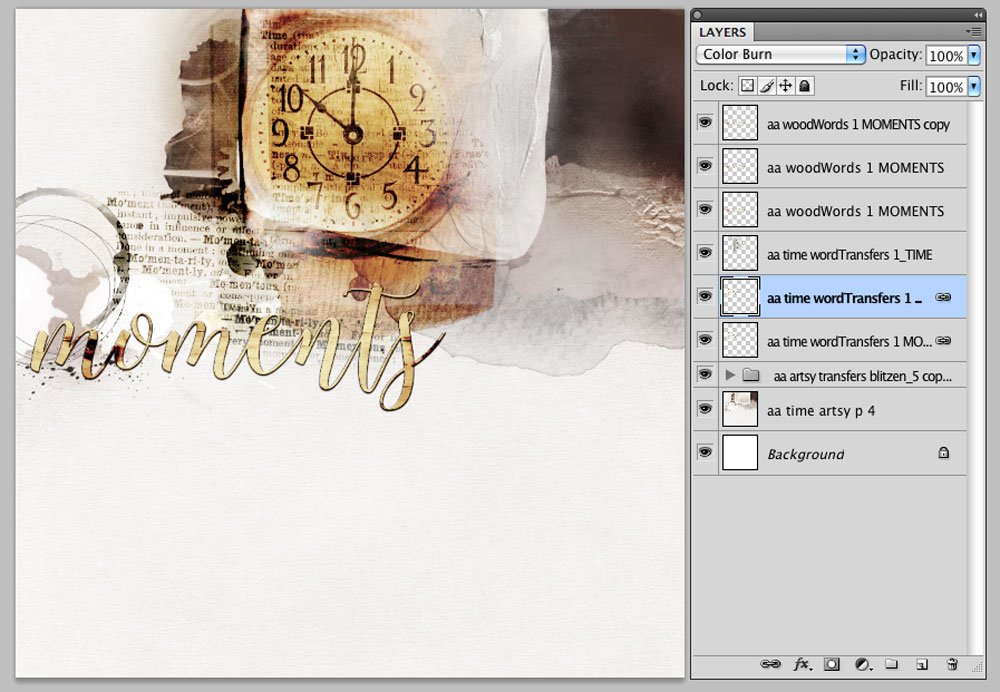
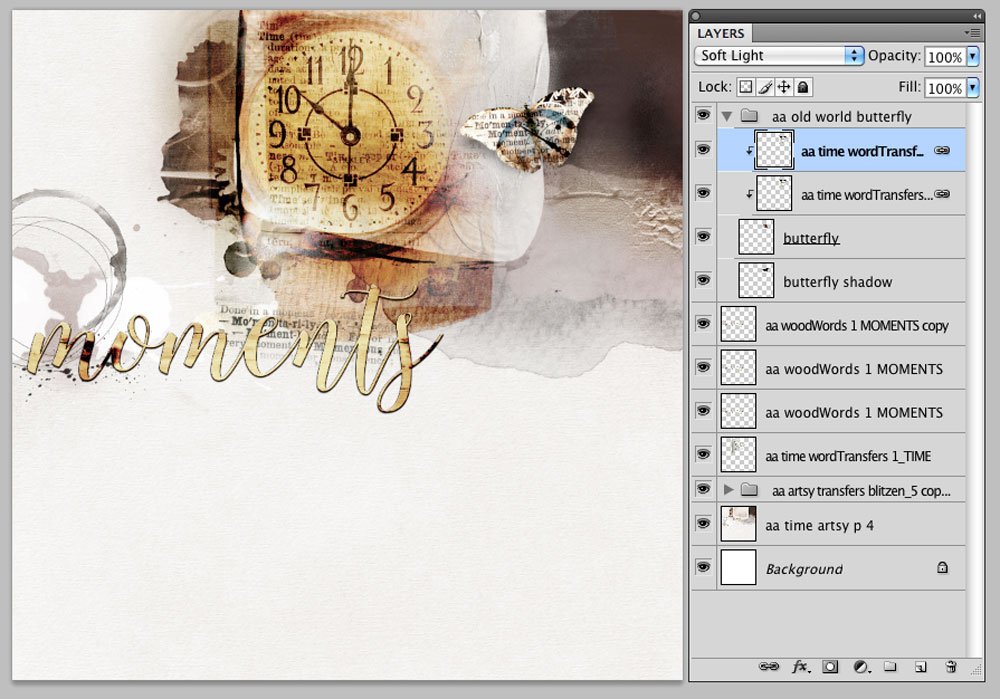
 1. Use Blending Modes with WordTransfers. Create a new 12 x 12 layout at 300 dpi. Open and move an artsy paper onto the layout. Position your image on the page. Select a WordTransfer of choice and layer it over the image. Experiment with different Blending Modes until you have the desired look. I like to start with Color Burn or Soft Light, sometimes duplicating the WordTransfer several times, depending on the darkness of the image or paper.
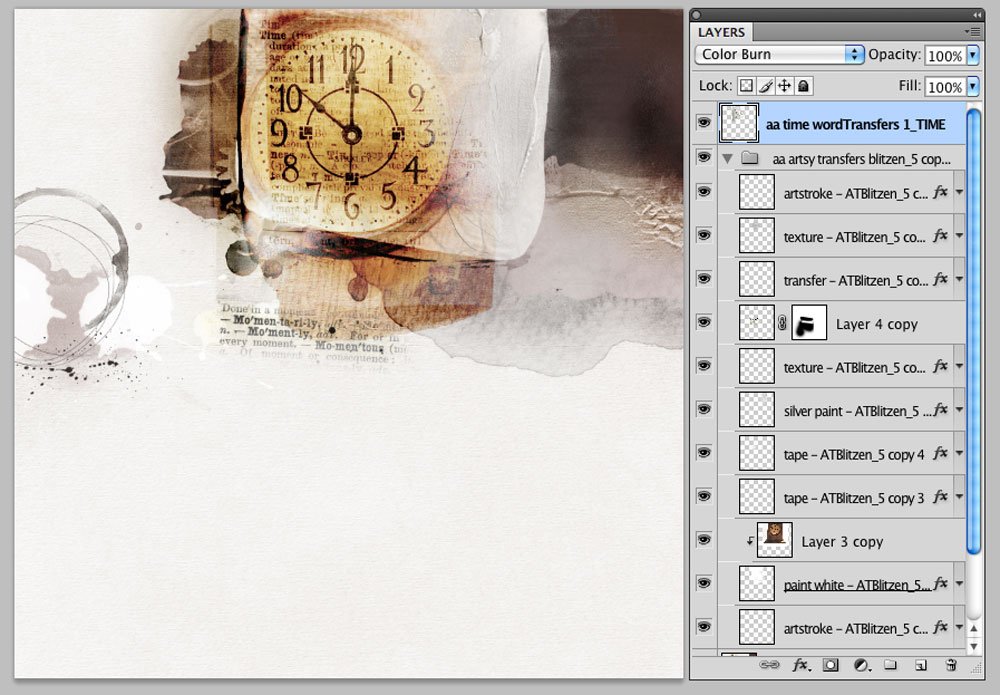
2. Use a WordTransfer for Emphasis. Anna has a plethora of WordTransfers that can be used to reinforce and strengthen your journaling message or create your own WordART. These transfers usually come in three different formats, original, script and artsy. Use them as is, or again, try different applying Blending Modes to create varying effects.
3. Use a Clipping Mask to add a WordTransfer to an Element. Select an element/object to be embellished and place it beneath the WordTransfer layer in the Layers palette. Clip the WordTransfer to the object by hoovering the cursor between the two layers (Option + click (Mac)/Alt + click (Windows). When the Option/Alt key is held down, the cursor turns into the wedding rings icon, shown between the top two layers. Clipping an upper layer to the underlying object creates a mask for the upper layer.
Note: If the WordTransfer doesn’t completely fit within the object, re-size it as needed. Apply the Luminosity Blending Mode to the WordTransfer layer to enable the object to partially show through the WordTransfer. Again, experiment with different Blending Modes, to achieve best results for your combination.
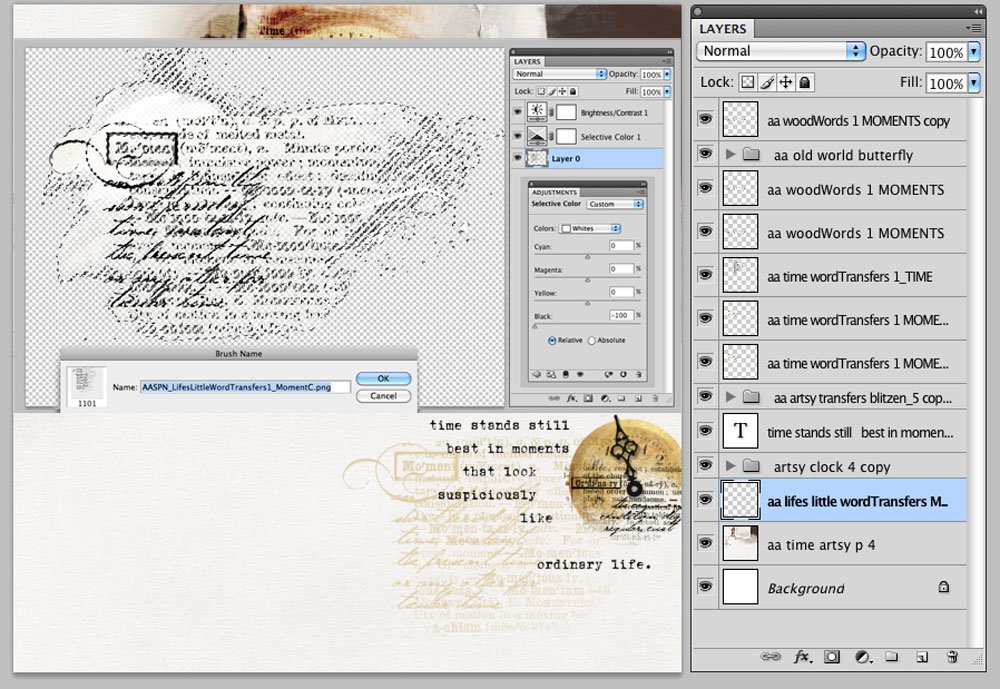
 4. Create a Brush using a WordTransfer. From the Adjustments menu (Image> Adjustment) select Brightness/Contrast. Increase the contrast of the image. Then choose Selective Color, under the pull down menu for Colors, select white, and increase it’s value by moving the slider toward the black side. With the WordTransfer layer selected in the Layers palette, use the Magic Wand tool (W) to highlight the white area (you will see marching ants denoting the selection), then press the Delete button on your keyboard so that only the black area remains.
To create a custom brush, go to Edit> Define Brush Preset, name the brush and select OK. The WordTransfer has now been loaded into the bottom of the Brushes Preset palette. Select a color of choice and re-size the brush and then begin stamping the WordTransfer brush onto new layers. See video Brushes #1 | Loading and Using Brushes Basics for further guidance in using brushes.
5. Embellish. Complete the layout by adding ArtStrokes, Elements, FotoGlows, and Stitching.
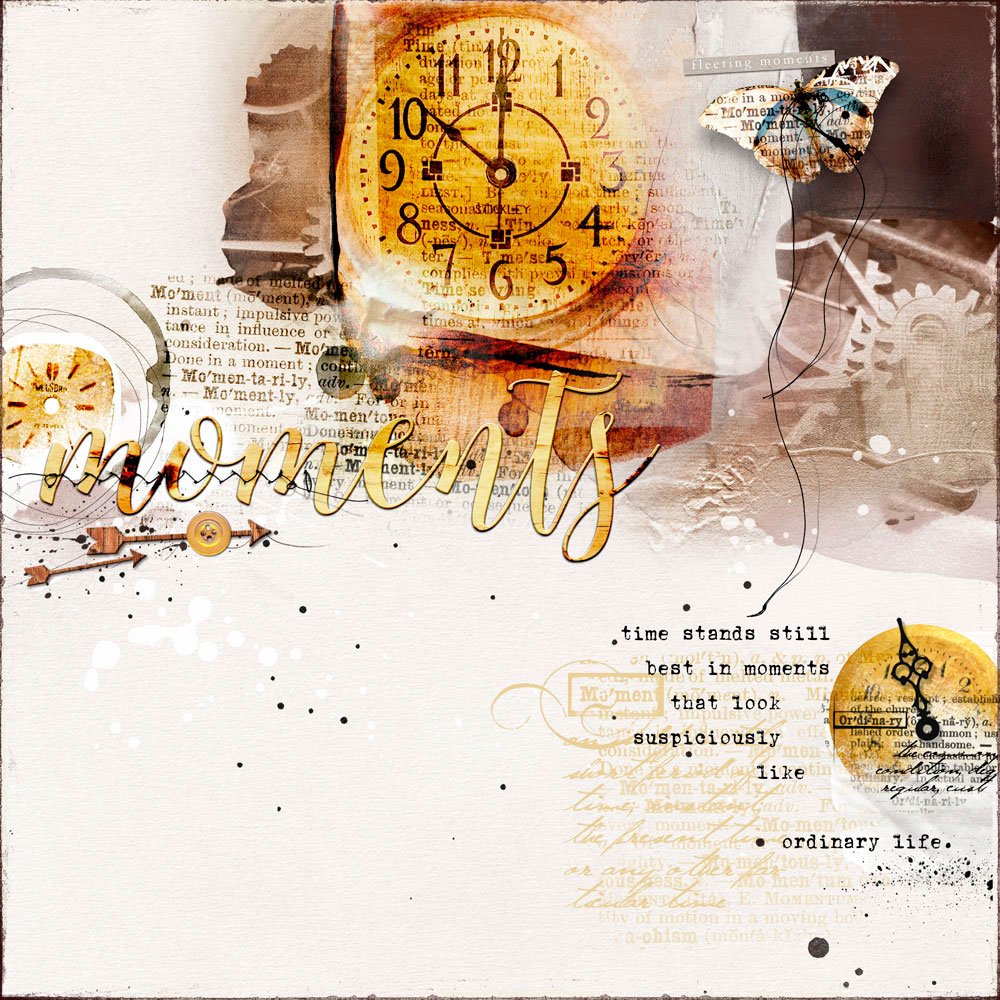
Click on the above photo for additional process notes and supplies used.


Thanks,Miki,lots of useful techniques in your tutorial!
This is soooo nice, Miki! You DID include a lot of techniques! I love that!
I have a question. Is there a way to get an e-mail whenever any post is made here on the blog? I thought I had signed up for them, but, apparently I didn’t. Thank you!
Su