

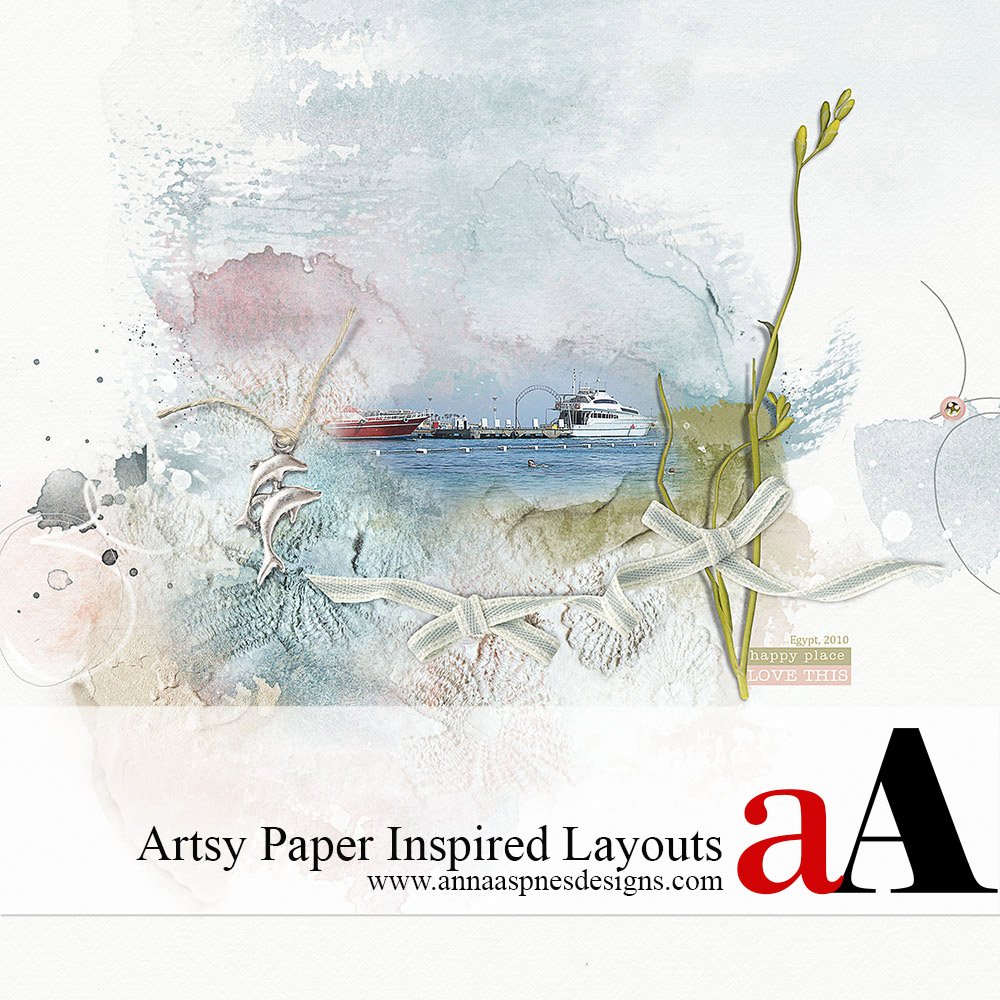
Today Margo is sharing how she creates Artsy Paper Inspired Scrapbooking.
This tutorial can be created in Adobe Photoshop and Elements (excluding the High Pass Filter).
Create Artsy Paper Inspired Layouts
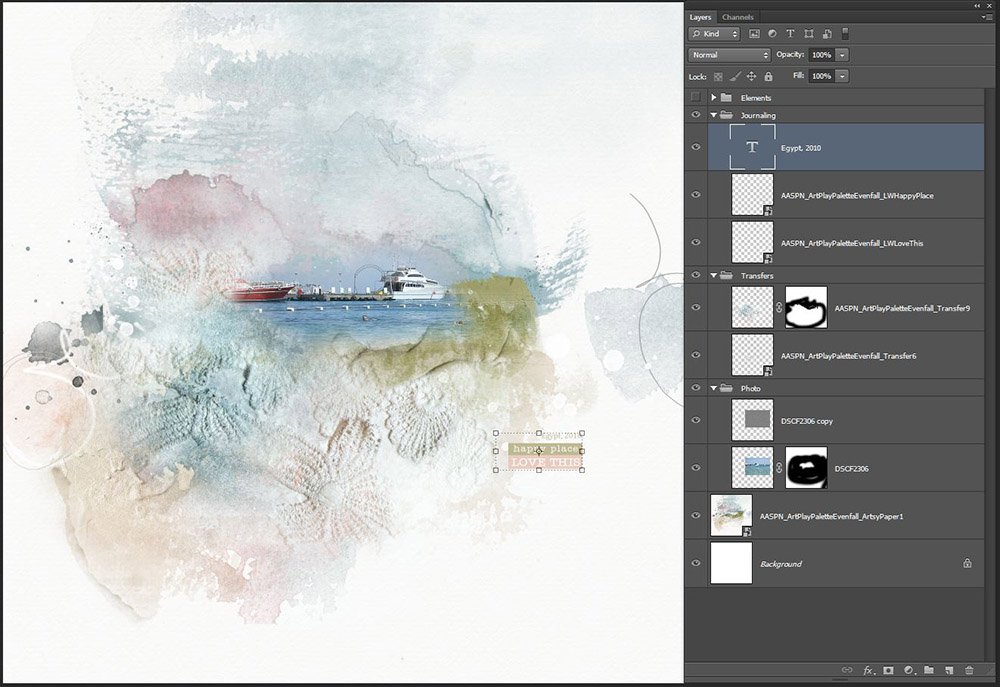
The sea and sky motifs in ArtsyPaper1.jpg from ArtPlay Palette Evenfall inspired the following digital scrapbooking and photo artistry layout.
1. Find Your Inspiration
Inspiration can be found in many places.
Find Inspiration:
- In the process of creating
- From your photos
- Through new techniques
- Participating in challenges
Inspiration can also come from external influences.
As a child, I liked to watch the clouds.
My imagination soared as I looked at all the different formations and tried to find familiar objects.
Even today, I enjoy this game.
Artsy Papers from ArtPlay Palettes are like clouds to me.
I look at the papers and see shapes, which remind me of images or places captured in my photos.
Then, the creating begins.
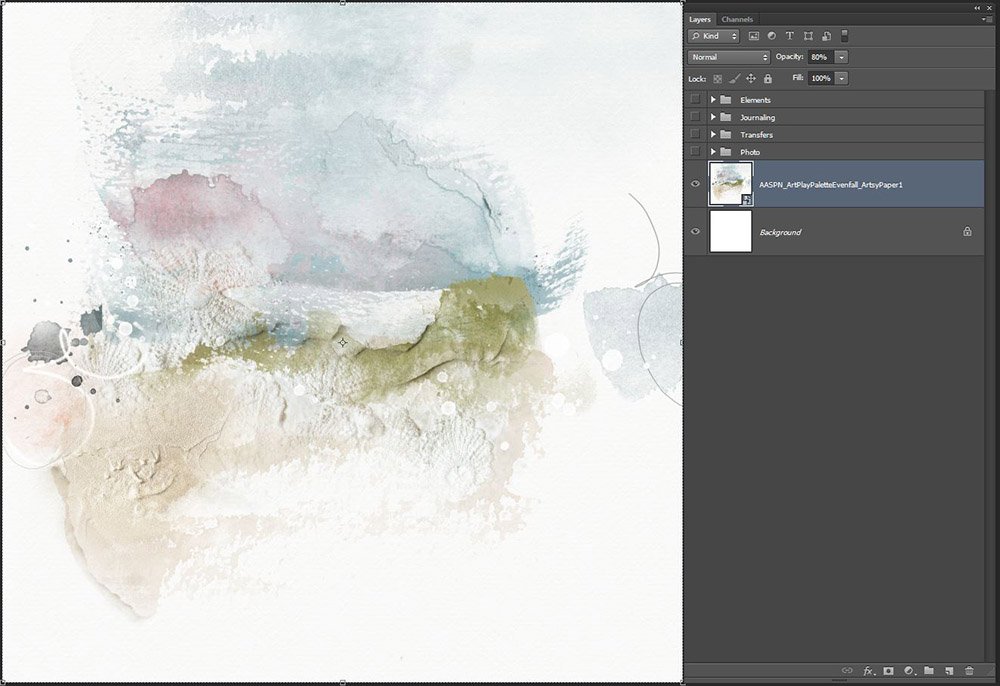
2. Establish Foundation
Start with a blank canvas or file in Photoshop or Elements and choose an Artsy Paper as your foundation.
- Go to File> New to create a 12 X 12 inch New Layout at 300 DPI.
- Select the Move Tool from the Tools Panel.
- Open and move ArtsyPaper1.jpg from ArtPlay Palette Evenfall onto the New Layout.
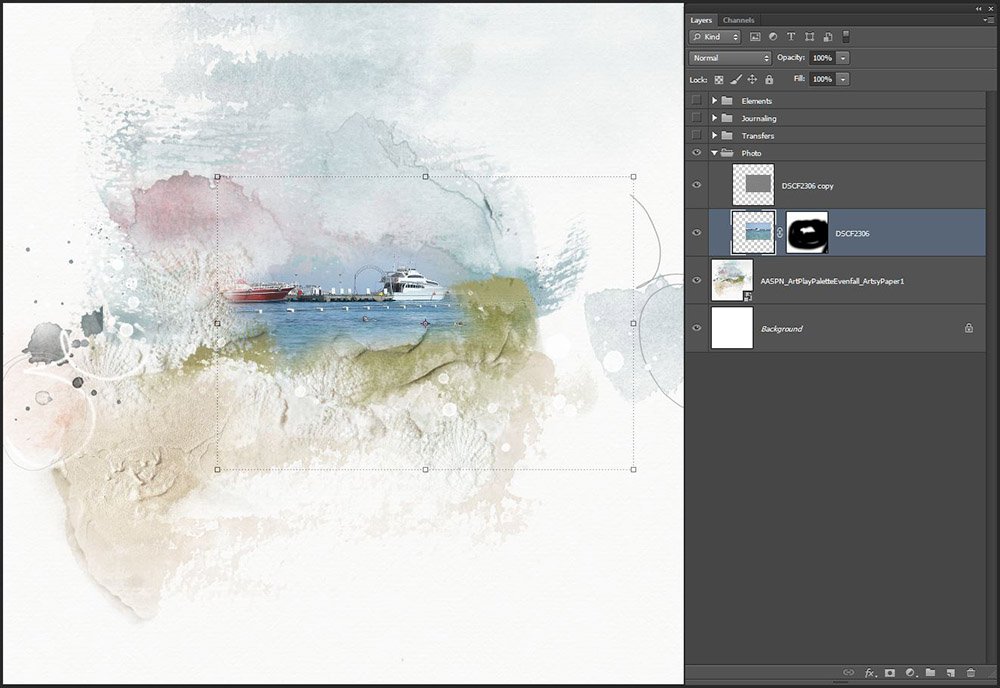
3. Build Focal Point
Blend a photo into the prominent area of the paper design and sharpen using the High Pass Filter.
- Open and move the photo onto the layout using the Move Tool.
- Edit the photo as preferred using Image> Adjustments> Levels/Curves (Photoshop) or Enhance> Adjust Lighting> Levels (Elements).
- Duplicate the photo layer by dragging it down (Photoshop) or up (Elements) to the ‘New Layer’ icon in the Layers Panel.
- Go to Filter > Other > High Pass and move the slider to a value of 4.3 (Photoshop Only)
- Set the Blending Mode in the Layers Panel to Overlay.
- Select the original photo layer.
- Apply a Layer Mask from the bottom (Photoshop) or top (Elements) of the Layers Panel and blend with brushes of your choice.
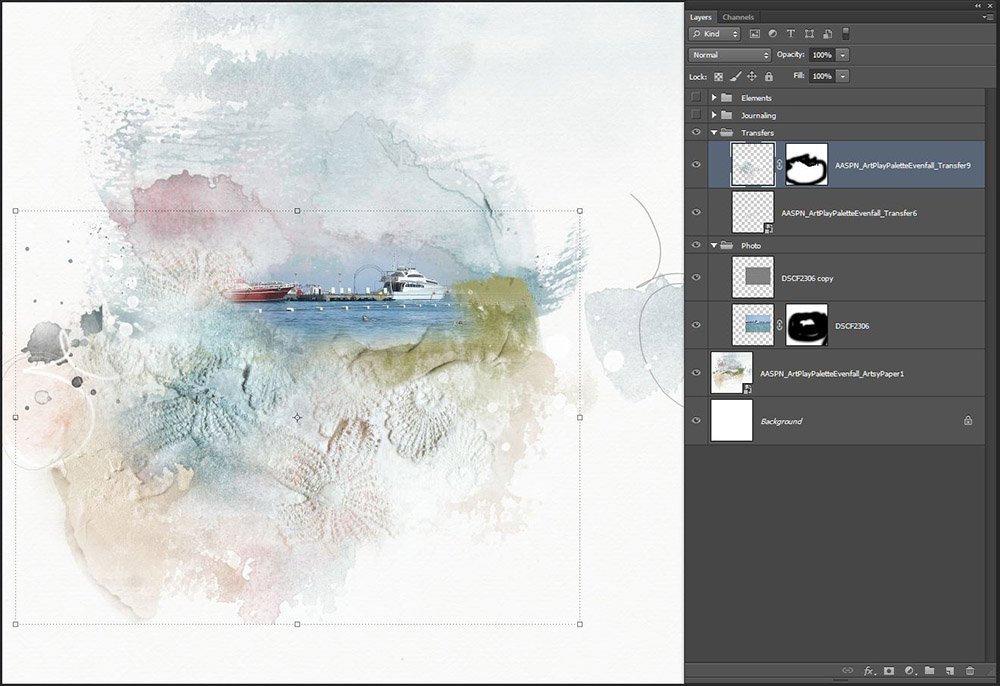
4. Support Photo
Add Transfers to support and embellish the photo.
- Open and place Transfer5.png then Transfer9.png from ArtPlay Palette Evenfall.
- Modify Transfers using a Layer Mask and Brushes as preferred.
 5. Add Context
Add specific words to describe the photo such as subject, names and date.
- Select the Text Tool from the Tools Panel.
- Click on the canvas and begin typing changing the Size and Font Type from the Options Bar at the top (Photoshop) or bottom (Elements) of your screen.
- Create a Text Box to contain or create wrap-around text by clicking down the left mouse button, dragging then releasing (CLICK-DRAG-RELEASE).
5. Add Embellishment
Open and place dimensional elements to support the photo and add visual interest.
- Notice how the Dolphin Charm, ribbon and foliage ALIGN with the bottom edge of the photo.
- This encircles the photo creating a ‘frame’ and serve to draw the eye into the focal before guiding the viewer around the design.

Happy Place | Margo
More Artsy Paper Inspired Layouts
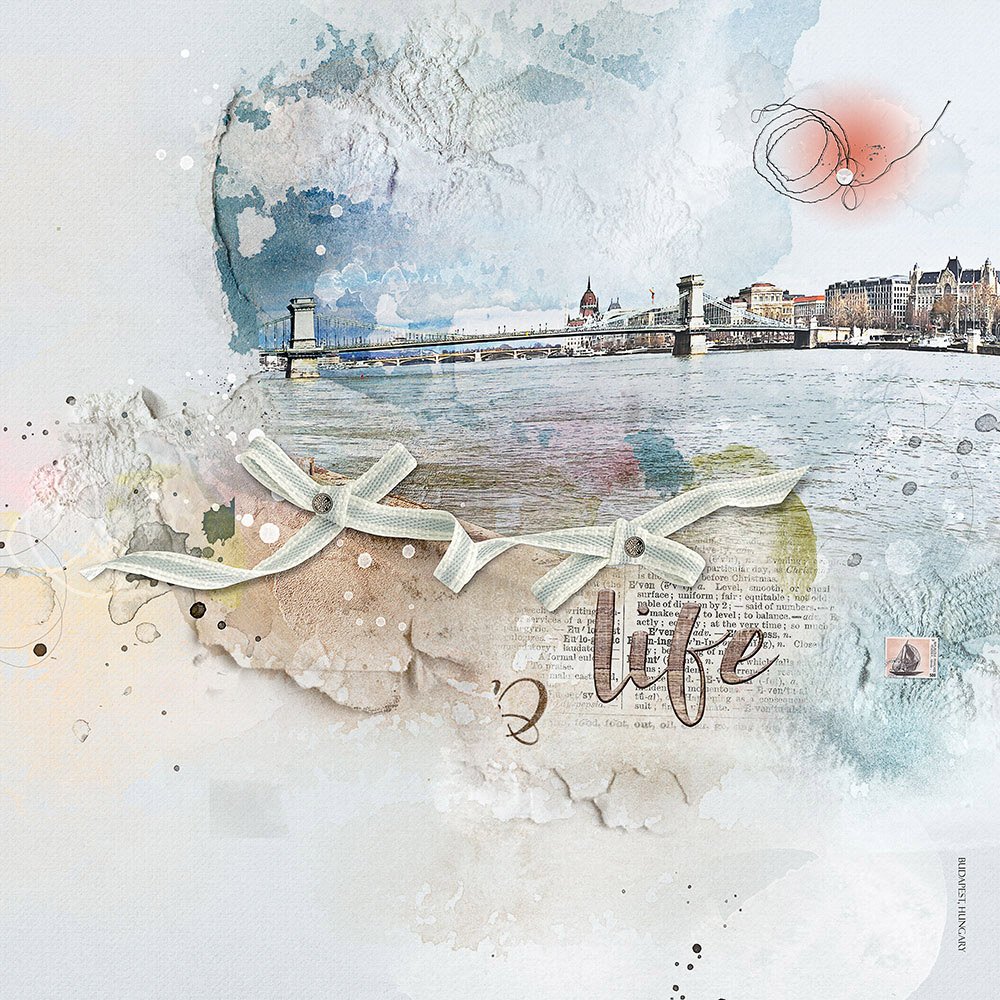 Budapest | Margo
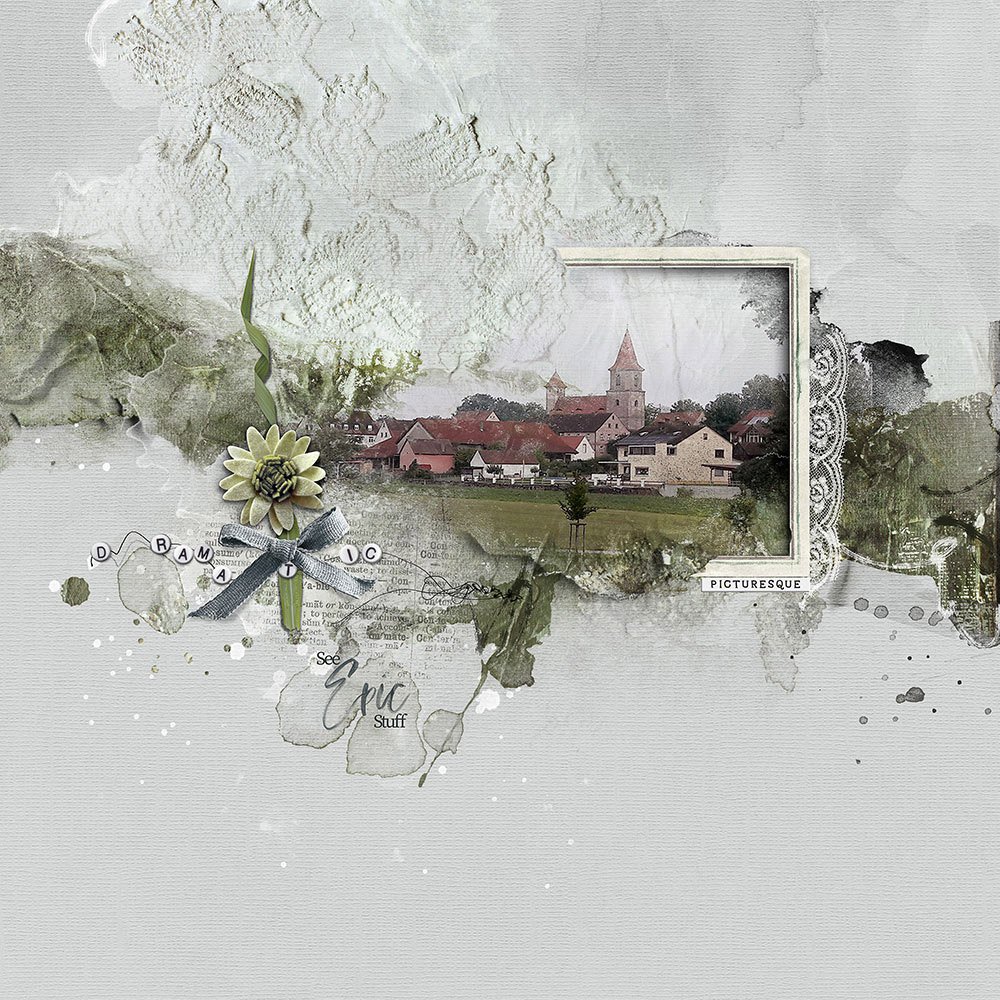
Büchenbach | Margo
POST YOUR LAYOUTS USING THESE GRADIENT TOOL PHOTO COMPOSITES TECHNIQUES IN THE ANNAGALLERY.
And if you liked this post, leave some love in the comments below.


Love these layouts Margo! Gorgeous colour choices and I love how you used the embellishments! Beautiful work!
Totally agree Charlene. Thanks for sharing.
Margo, I enjoyed reading about your comparison of clouds and Anna’s ArtPlay Palettes–how they both spark your imagination! Delightful article and examples of your creative photo artistry! Thanks for sharing with us!
Margo, örültem, hogy olvastam a felhők és Anna ArtPlay paletták összehasonlításáról – hogy ezek mindkettője szétválasztja a képzeletét! Finom cikk és példák a kreatív fotóművészetre! Köszönjük, hogy megosztotta velünk!
It’s always fun to hear how other creative minds work 🙂
Thank you Margo for sharing this beautiful page and your gorgeous design. Your lay out is so gentle and tranquil and the colours are really lovely. I don’t have this particular pallet yet but it is now on my wish list. I also still find pictures and objects in our fascinating clouds.
Thank you again and thank you Anna for the beautiful pallets that you design
Thank you for your support Jean.