

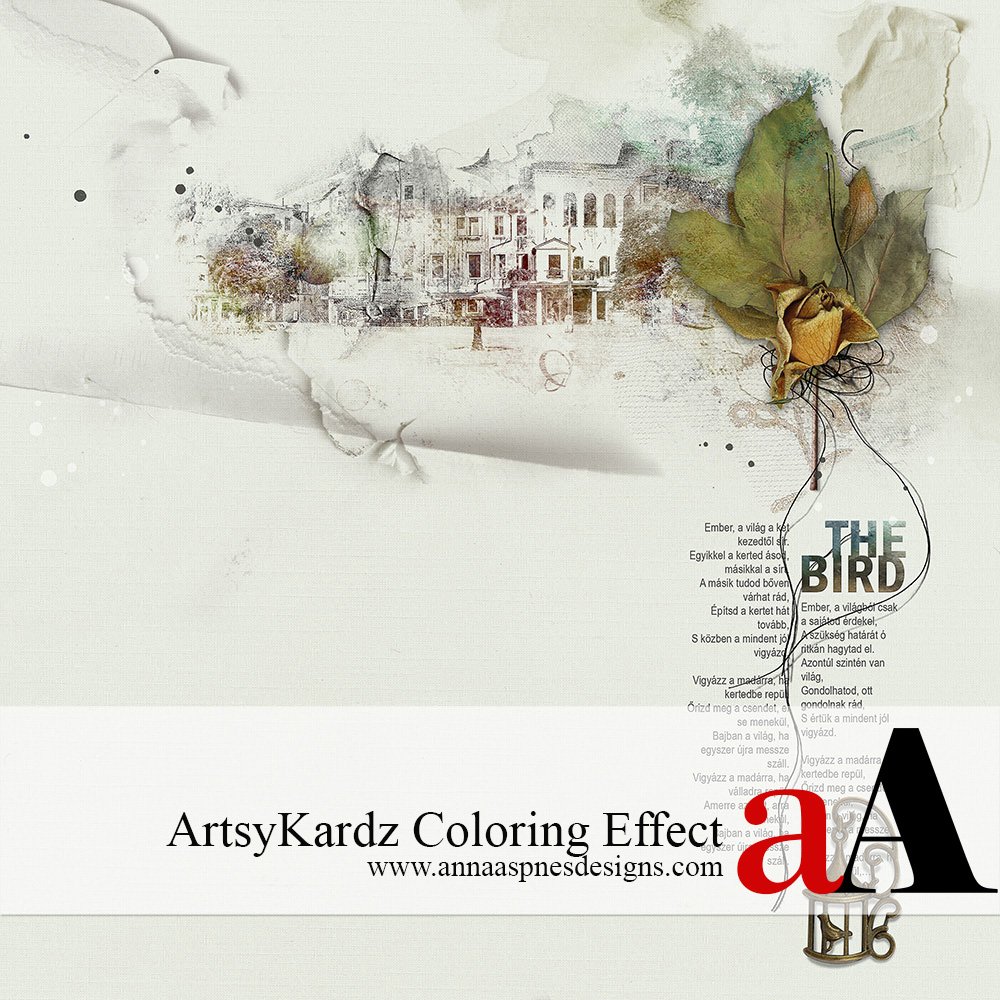
Today, Margo is sharing a fun ArtsyKardz Coloring Effect.
ArtsyKardz Coloring Effect
Introduction
Colorize WordART, Brushes and Text using ArtsyKardz .jpg files.
- Apply a cool color gradient effect to WordART and BrushSet files.
- Make the magic happen using the Clipping Mask function.
- Coordinate COLOR in your layout designs quickly and with ease.
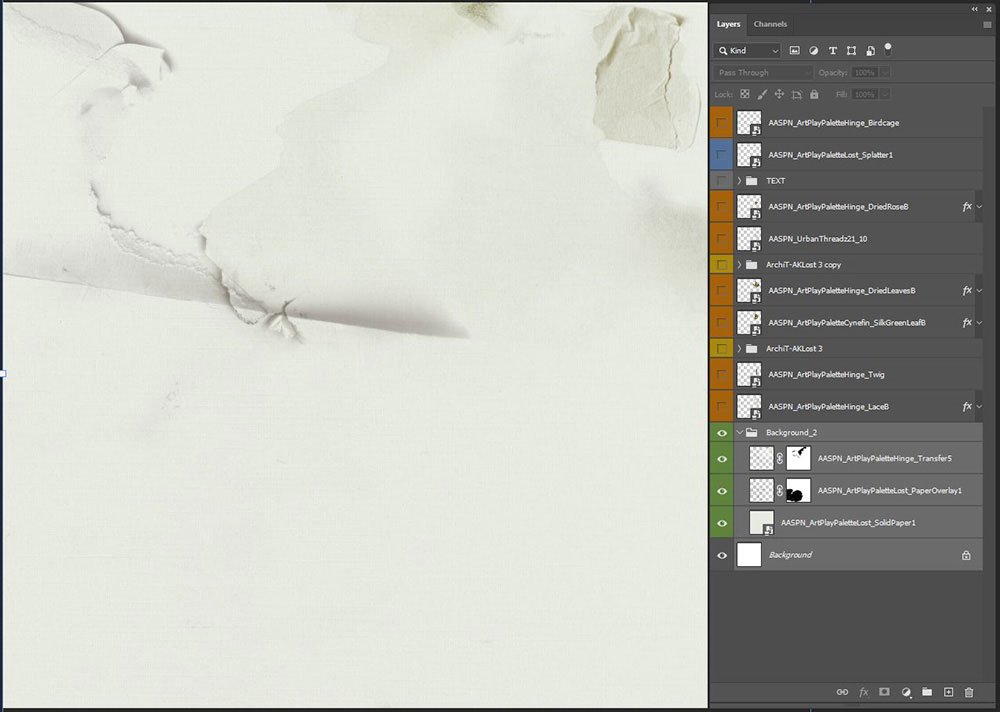
1. Establish Layout Foundation
Use a variety of DigitalART supplies to build your layout foundation.
- Go to File> New and create a New Layout at 12 X 12 300 DPI/PPI.
- File> Open SolidPaper1.jpg from ArtPlay Palette Lost and move onto the New Layout using the Move Tool.
- Open, move and position the PaperOverlay1.png and Transfer5.png file from ArtPlay Palette Lost.
- Modify the elements using a Layer Mask and Brushes to preference.
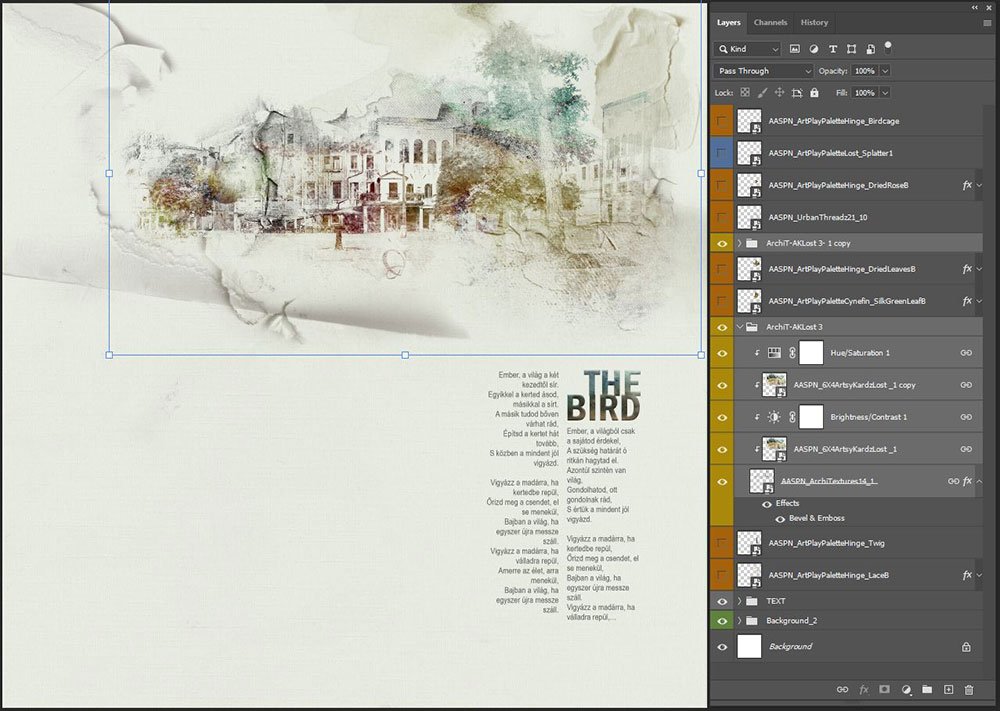
2. Placement of Text
‘Borrow’ text from an Artsy Layered Template and customize using ArtsyKardz files.
- Open the Lost Artsy Layered Template into your Photoshop or Elements workspace.
- Select the ‘text’ and ‘title here’ layers in the Layers Panel.
- Link the 2 layers by clicking on the ‘clip’ icon at the bottom (Photoshop) or top (Elements) of the Layers Panel.
- Move the text layers onto your layout foundation and reposition as preferred.
- Edit the text and title layers to provide context to your photo.
- Open a 6 X 4 .jpg file from ArtsyKardz Lost MultiPack.
- Resize as needed and clip the file to the title layer using the Clipping Mask function.
- Go to Layer> Layer Style> Bevel & Emboss to add dimension.
Tip. Select the ‘Pillow Emboss’ Style option to create the indentation.

3. Create a Visual Focal Point
Introduce an image to support the text and create a focal point using the foundation as your guide.
- Open the 1.png from ArchiTextures No.14.
- Apply a Bevel & Emboss Layer Style to strengthen the edges and add visual interest via dimension.
- Open a 6 X 4 .jpg file from ArtsyKardz Lost MultiPack.
- Clip the file to the brush layer adjusting the SIZE and COLOR as preferred.
- Duplicate the ArtsyKardz layer and apply a Linear Burn Blending Mode.
- Adjust the Opacity of the layer as preferred.
Optional:
- Layer> Group Layers and duplicate to increase visibility of the image.
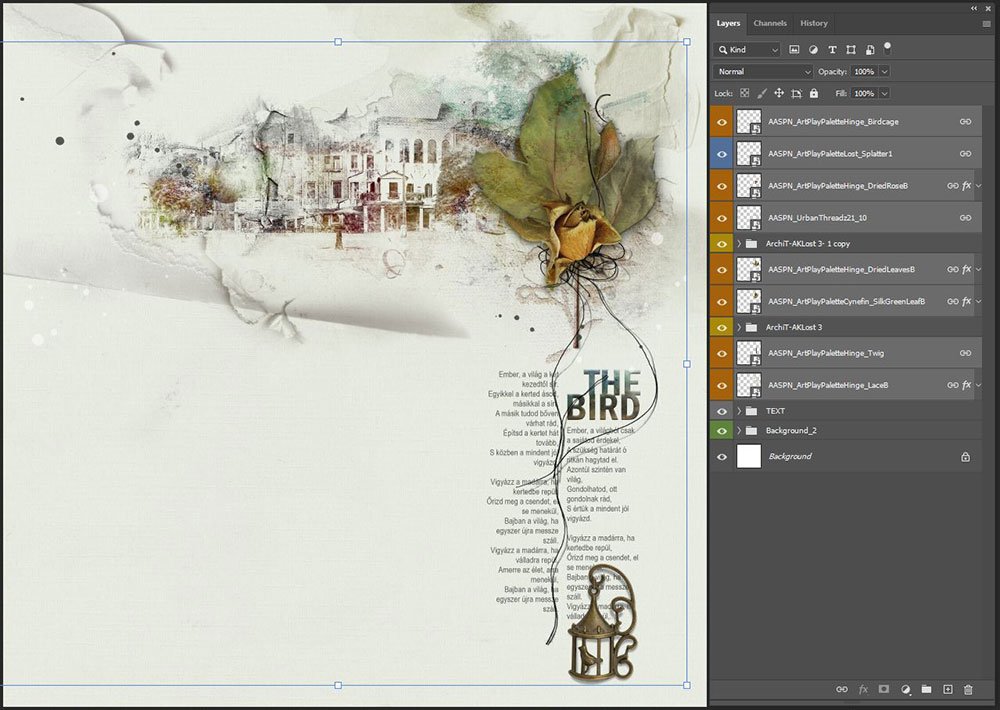
4. Embellish Your Design
Add DigitalART to elevate the visual interest of your composition.
- Select embellishments according to COLOR and THEME of your photo artistry or digital scrapbooking layout design.
- Use UrbanThreadz to lead the viewers eye to specific areas of interest in your design such as the text.
DigitalART Supplies
See the complete list of aA DigitalART supplies.
Summary
Use ArtsyKardz to color your aA Digital supplies.
- Borrow pre-designed text boxes from Artsy Templates.
- Clip ArtsyKardz to elements in your layout design to create color coordination.
- Try this approach with the individual .psd format ArtsyKardz layers to further customize.
WE INVITE YOU TO:
- Read this 7 Ways to Use ArtsyKardz on the aA Blog.
- Watch this Blending with ArtsyKardz video on the aA Youtube Channel.
- Learn how to create this ArtsyKardz Cut-Out Title Effect.
AND IF YOU LIKED THIS ArtsyKardz Coloring Effect, PLEASE CONSIDER SHARING IT USING THE SOCIAL MEDIA BUTTONS BELOW


Thank you Margo and Anna for the explanation of the beautiful design using Artsykardz!
Thank you very much for your feedback, Francine! I was glad you found the description useful.