

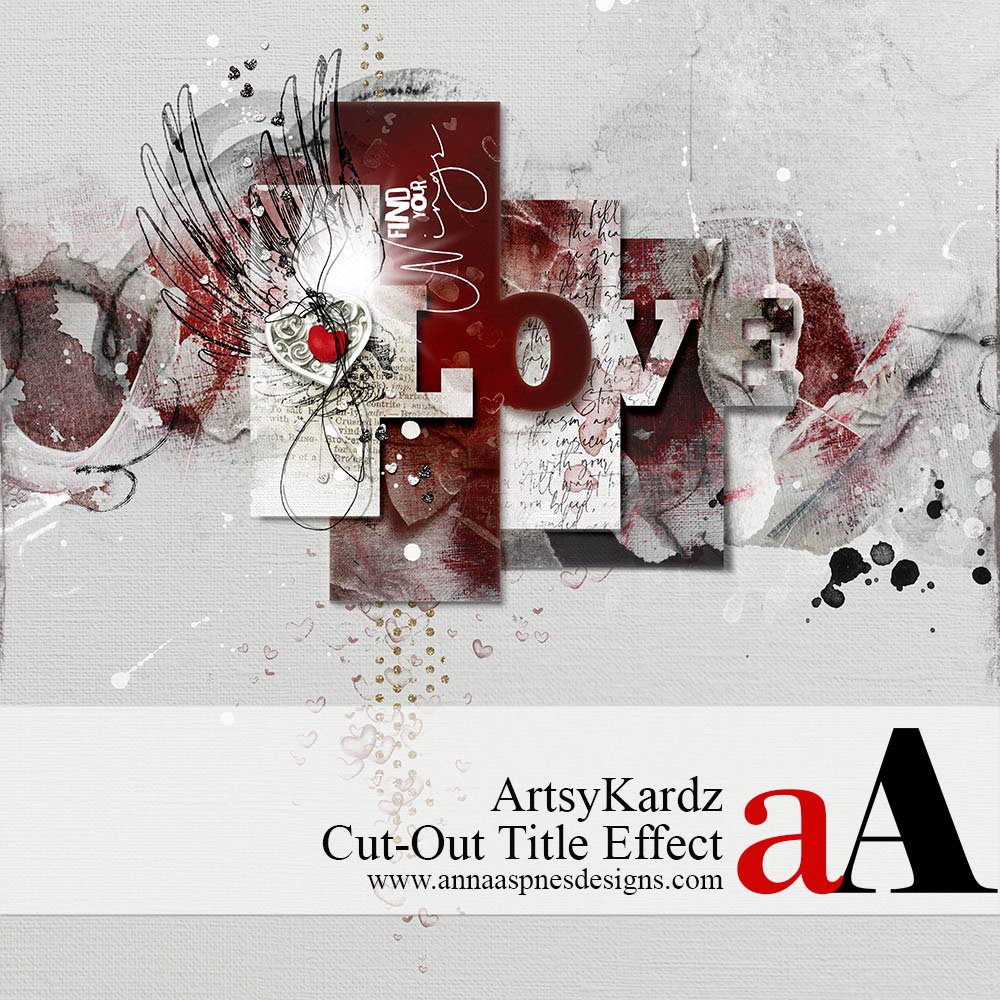
Today Creative Team Member, Barbara Houston, is sharing ArtsyKardz Cut-Out Title Effect tutorial.
ArtsyKardz Cut-Out Title Effect
Introduction
Create a letter template and embellish with ArtsyKardz to create an awesome cut-out title effect.
- Use Pinterest to find layout design ideas.
- Create a custom letter mask using the Shape Tool with a Font in Adobe Photoshop or Elements.
- Use the Clipping Mask Function to make the magic happen.
1. Select ArtsyKardz
Choose a variety of ArtsyKardz for your layout project.
- Use the .jpg format ArtsyKardz file for this project.
- Select a variety of sizes to create visual interest in your design.
- Duplicate the use of the same ArtsyKardz file as preferred.
- Arrange the chosen ArtsyKardz files on a New Layout foundation.
Note. The ArtsyKardz Magoa MultiPack was used in this layout design.
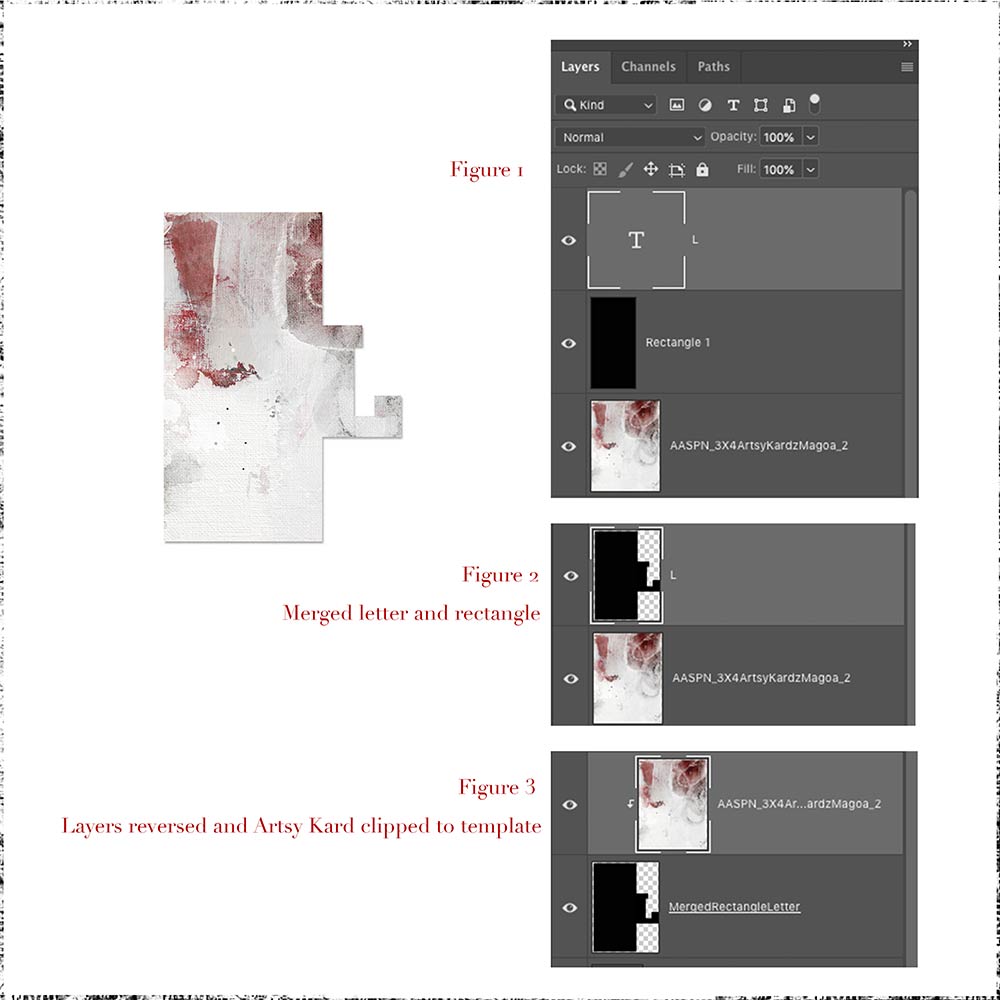
2. Make Template
Make a template using the Shape and Type Tools.
- Select the Rectangle Shape Tool from the Tools Panel.
- Ensure the Shape and Fill are selected in the Menu Bar at the top of your screen.
- Draw out a rectangle a little more than half the size across over the ArtsyKardz file.
- The shape will appear on its own layer above the ArtsyKardz layer in the Layers Panel.
- Select the Type Tool from the Tools Panel.
- Type the letter ‘L’ using Chunk Five font.
- Resize the letter with the Transform Tool as needed to enlarge.
- Position and overlap the letter a little bit over the rectangle shape.
- Merge the letter to the rectangle by selecting both layers in the Layers Panel.
- Right click and choose Merge Layers from the pop up menu.
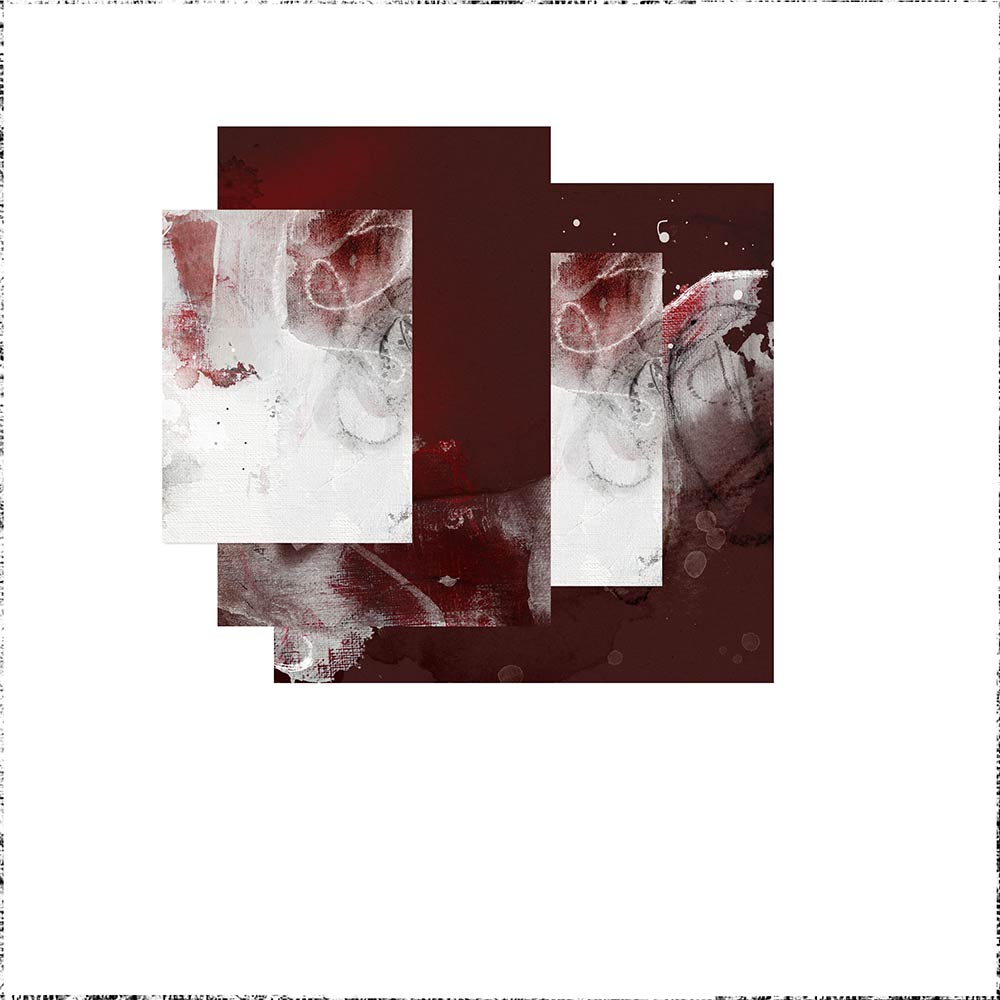
- Repeat to create a template for all the ArtsyKardz in your layout design, modifying the size as needed.
Note. See below image for how the template is created for all the chosen ArtsyKardz files.

3. Clipping ArtsyKardz
Clip ArtsyKardz files to the template layers you have created.
- Move the ArtsyKardz layer above the template layer in the Layers Panel.
- Clip the ArtsyKardz layer to the letter template layer using the Clipping Mask Function so that design conforms to the shape of the underlying template.
- Repeat for all the template layers.
Tips.
- Use the Arrow Keys on your keyboard to slightly ‘nudge’ the elements to perfect positioning.
- Add WordART, ArtsyStains and paint Splatters as well as dimensional elements.
 Summary
Think outside the box when using ArtsyKardz.
- Clip these the .jpg format files to any digital image or element
- Use the layers individually from the .psd format files as preferred as overlays.
- Get creative in creating other templates using your aA DigitalART supplies.
WE INVITE YOU TO:
- Read Using Glyphs in Photoshop Elements
- Watch Guidance for using ArtsyKardz.
- Learn 7 Ways to Use ArtsyKardz.
POST YOUR PAGES USING THESE VIDEO TECHNIQUES IN THE ANNAGALLERY.
And if you liked this post, please support us by sharing it using the social media buttons below.


This is so beautifully done. Thank you for the ideas.
Barbara is SO clever!
Superb graphic artistry, Barbara! Thanks for sharing!