


Creative Team Member, Ulla-May, shares her ArtsyKardz vintage photo transformation tutorial conducted in Adobe Photoshop seeing as there is no new release this week.
Note that this tutorial can also be completed in Adobe Photoshop Elements.

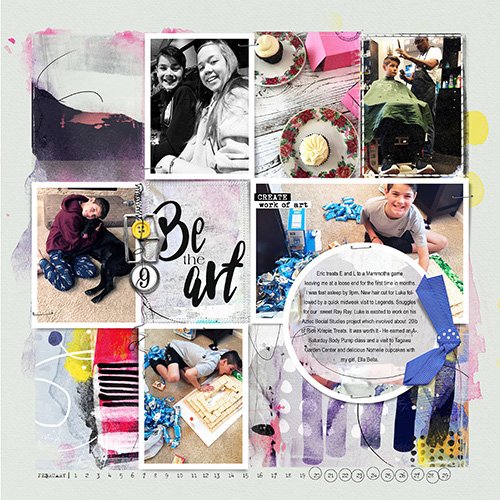
ArtsyKardz Vintage Photo Transformation


Create Layout Foundation. Choose a FotoBlendz clipping mask and place it on a background paper. I chose a FotoBlendz file from FotoBlendz Clipping Mask ValuePack No. 1.

Select an ArtsyKardz. Place the ArtsyKardz file on a layer above the FotoBlendz clipping mask and set the Blending Mode to Lighten. I chose an ArtsyKard from 4 x 6 ArtsyKardz Home.
Working with Duplicate Layers. Create a copy of the ArtsyKardz layer and set the Blending Mode for the copy to Linear Burn. Move your photo onto the layout and place it between these two layers in the Layers Stack. Set the Blending Mode of your photo layer to Luminosity, then clip your photo layer to the first ArtsyKardz layer (CMD/CTRL+ALT+G) and the ‘Color Burn’ ArtsyKardz layer, above the photo, to the photo layer.

Apply a Layer Mask. Add a Layer Mask to the original ArtsyKardz layer (beneath the photo) (Layer>Layer Mask), select Reveal All from the fly-out menu and then OK within the dialog box click.
With your Foreground Color set to WHITE and your Background Color to BLACK, mask the selected photo. You can also use your Eraser tool to erase any parts of the ArtsyKardz that reveals parts of the photo you’d like hidden.
I erased most of the ArtsyKardz that was outside the FotoBlendz, and used this same technique on the ArtsyKardz layer clipped to the photo, to eliminate the faces of the woman and child on the left side of the image.
Add a Transfer/Transfers. Place a Transfer on the top of the layer stack and set the Blending Mode to Overlay. Reduce the Opacity of this layer.
Apply another Layer Mask to the Transfer layer and mask as preferred as outlined above.

Note that it´s a good idea to experiment with different Blending Modes when using this technique. The effect changes depending on your choice of ArtsyKardz and Transfers.
A variety of Transfers can be found with the Transfers and Overlays folder included in each ArtPlay Palette.
SAVE 50% ON ARTSYKARDZ
We have a special coupon saving for you this week valid on the ArtsyKardz category of aA store ONLY.
Save 50% on ArtsyKardz for ONE week.


What a great tut—will definitely try this technique. I’m a big fan of artsy kardz too!
Thanks for sharing!
Your layout is exceptional, well done!
The ‘Post Card’ is familiar to me, don’t know if I have it or not but wonder what kit it is in? Could you let me know?
Linda
ArtsyTransfers Together: http://www.oscraps.com/shop/ArtsyTransfers-Together.html
ArtPlay Palette Together: http://www.oscraps.com/shop/ArtPlay-Palette-Together.html