

Today, Creative Team Member, Joan, is sharing her process for combining new and old photos.
Combining New and Old Photos
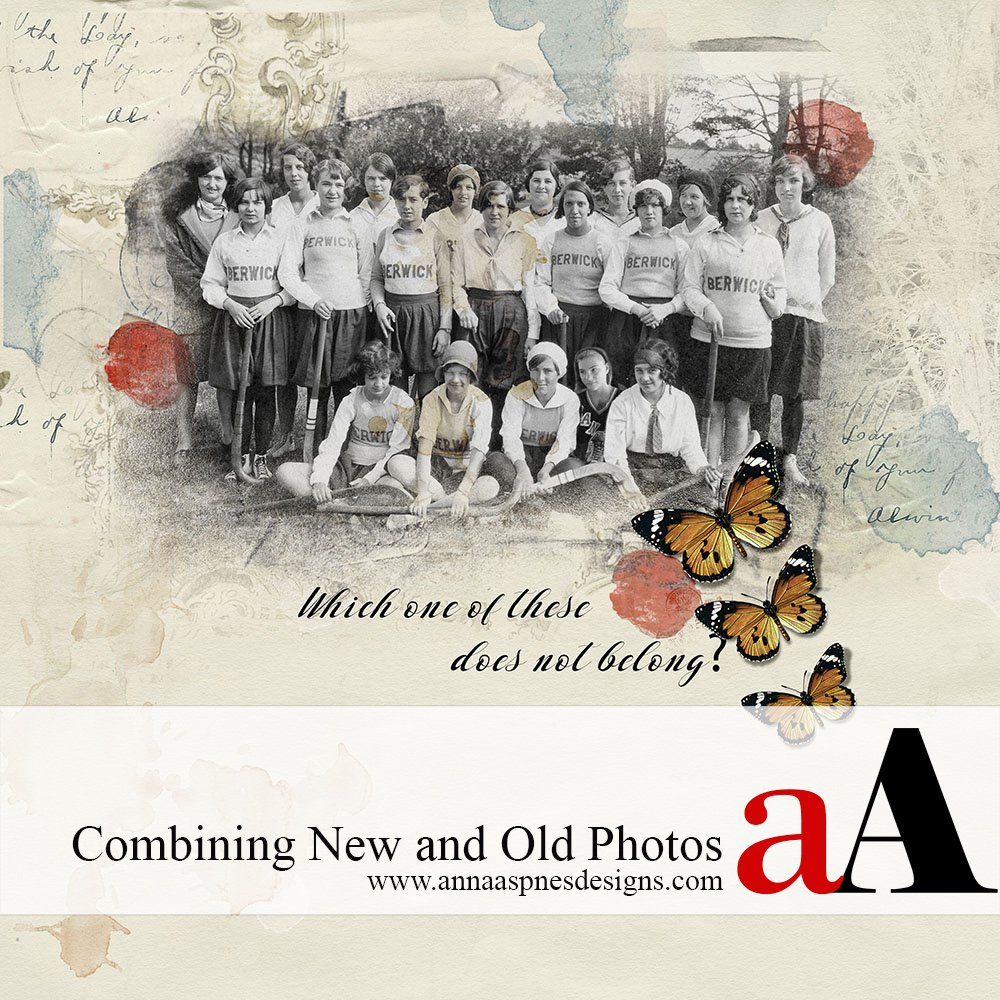
Want to add a little fun to your heritage photos? How about adding a picture taken recently to a heritage photo so it looks like the person is actually there.
My Grandniece, Nina, is becoming the family historian with an interest especially peaked by recently moving into the town her Great Grandmother (my mother) grew up in. Nina discovered a picture that her Great Grandmother was in when she was in school. I told her I had that picture. I had just scanned it into my heritage catalog so I gave her the original. But it got me thinking how she would love to e there. So I added a picture of her when she was in high school to my mother’s picture.
Select Your Photos
Choose your photographs carefully because this is the most important step.
Look on the heritage (Old) photo for a place to insert the New picture and on the New picture something when it is added to the Old photo will look like it belongs there.

For my heritage photo I chose a picture of a girls hockey team in which my mother appears (back row far right). I chose it because you can see a nice space between two of the players who are sitting on the ground into which I can place the New photo.

For my new picture I selected one of my pictures which is of my mother’s great granddaughter, Nina. This was taken when she was sitting on a boat. It won’t matter that you cannot see Nina’s legs because it will look like they are hidden by the other girls in front of her.

Adjust the New Photo
Adjust the New picture so that it will match the Old as close as you can make it.
Take the New photo click on Image>Adjustment>Black and White. Run the Add Noise Filter – Filter> Noise>Add Noise set to about 12. You do this to match the noise you can see on the Old picture.

Prepare to Combine Photos
Place both photos on a new document and line them up.
Open a new document in Photo Shop large enough to hold the pictures. Place the New photo on the page first and then the Old photo. You should have three layers. Reduce the Opacity of the Old picture so you can clearly see the New picture below. Then move the New picture into the place using the Move Tool where you want it to appear withing the Old, resize by using the Control T and Clicking on the picture and moving the handles to size it appropriately.

The New Picture appears in the Old Picture
Use a mask to adjust the New picture so that it fits into the Old one.
Start by adding a mask to the Old photo by clicking on the Add Mask Icon. With the mask selected, use the Brush Tool from the tools and with black, color over the parts of the New photo that you do not want to see in the Final photo. You can switch between white (to reveal) and black (to conceal) so that you just see the part of the picture you want in the final picture.. Before you are done return the Old picture to 100% opacity. You can see if it looks satisfactory. You can still play with the black and white on the mask until you think it is done.
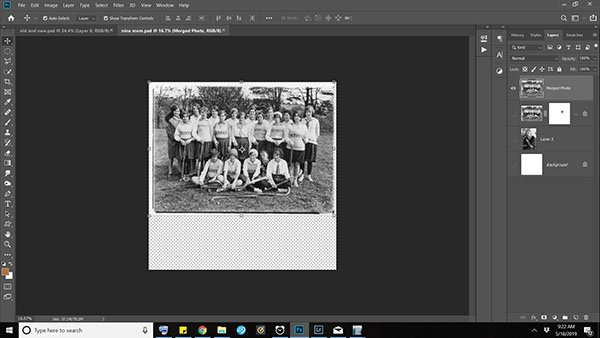
Create a Merged Layer
Create a merged layer to use in your scrapbooking.
Now take the steps to create a Merged Layer that you can use to create a scrap page. Start by clicking on the top layer and click on Layer – Merge Layers in the menu.
Save Your Work
Save your work so you can use it to create a scrapbook page.
Click on Save As and save your photo where you can find it later. Next click on the merged layer and click on Layer>Duplicate the layer in the pop up menu select to a New Document. Save this layer also. This is the copy you will use in your page.

Summary
Now you have a fun photo to use in your scrap booking. Be sure your new photo is properly masked and that no parts of it show in the finished photo that are not wanted. If you zoom in you should see that the old and new both have noise and that is how the new is less conspicuous.
Now start that scrap page which I hope you will post in Oscraps. I will mine.
Post your digital artistry and artsy digital scrapbooking pages in The Gallery, and if you liked this Upside Down Extraction and Compositing Technique tutorial, please consider sharing it using the social media buttons below


This is such a clever idea, especially to depict the way we inherit interests and personalities from our ancestors. The geographical bonds that your niece is feeling are surely strengthened all the more in seeing how deeply and intricately she is rooted. It is amazing sometimes how that works.
Yes!