

Today, Creative Team Member, Dale Botha, is sharing how to create Custom Backgrounds in iPad Procreate.
Follow this tutorial on your iPad, however, this process is also very easy to adapt to Photoshop and Elements.
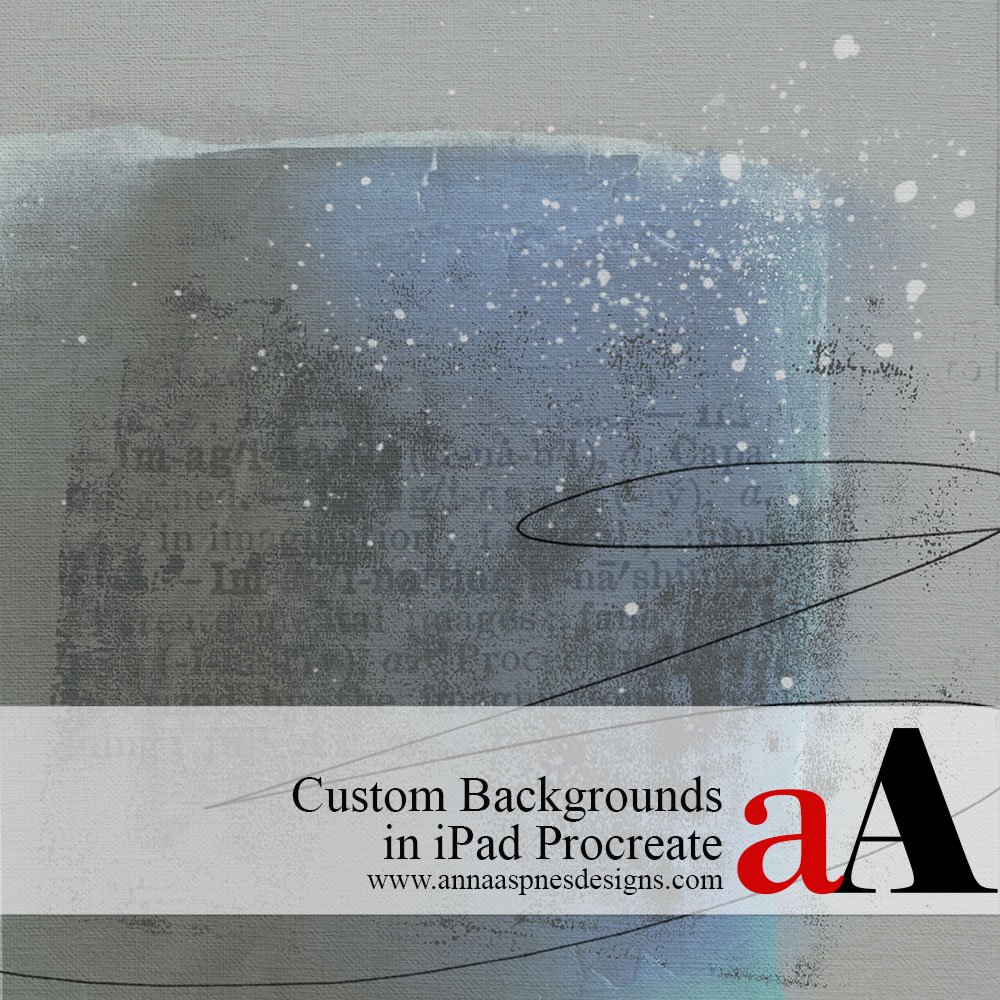
Custom Backgrounds in iPad Procreate
Learn how to create custom backgrounds using Anna Aspnes Designs products on your iPad in Procreate.
- Inspires creativity and a starting point for your digital designs.
- Yields backgrounds to suit your photos and preference.
- Supports a unique approach to your photo artistry and scrapbooking.
1. Create Foundation
Import and blend one or more digital papers in Procreate.
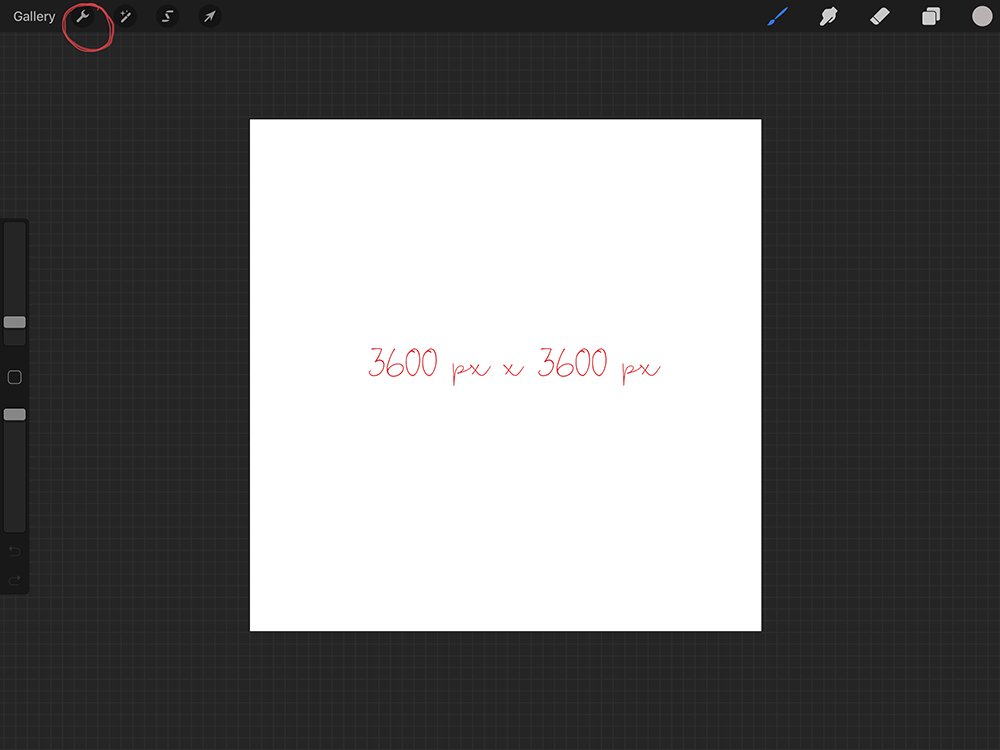
- Open Procreate on your iPad.
- Tap on the ‘+‘ button located at the top right-hand corner of your screen.
- Select the Black Folder enter 3600 x 3600 px or your preferred dimensions.
- Go to the ‘little wrench’ icon at the top left-hand corner of the screen.
- Tap on Add and select Insert a Photo from the drop-down menu.
- Navigate to your ‘camera roll’ or a specific ‘album’ and select a Solid Background Paper.
Note. If your Solid Background Paper has the same dimensions as your Background Layer ‘foundation’ in Procreate then it will fit perfectly on import.
Tip. You can import more than one Solid Background Paper and each paper will remain on a separate layer, before adjusting the Blend Modes and Opacity as preferred to create different effects.
2. Add Visual Interest
Place a Transfer adjusting the size and position as preferred.
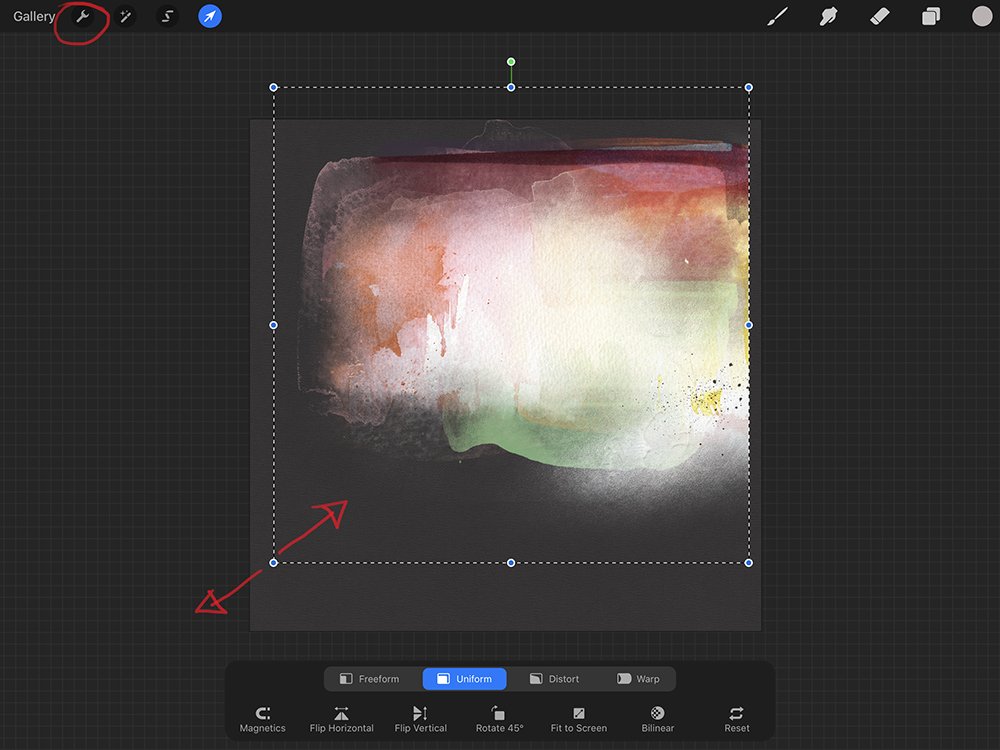
- Select a Solid Background Paper in the Layers Panel.
- Go to the ‘wrench’ icon at the top left-hand side of the screen.
- Tap on Add.
- Tap on Insert a Photo and navigate to a Transfer file choice.
- Tap on the Transfer to import into Procreate directly above the Solid Background Paper layer selected.
- Notice the square Bounding Box around the Transfer.
- Increase or decrease the size of the Transfer by dragging the corners of the Bounding Box outwards or inwards respectively.
- The handle with the ‘green dot’ can be used to rotate the position of the Transfer.
- Tap on the ‘layers’ icon (two overlapping squares) on the top right hand side of the screen to remove the Bounding Box and confirm the position of this layer.
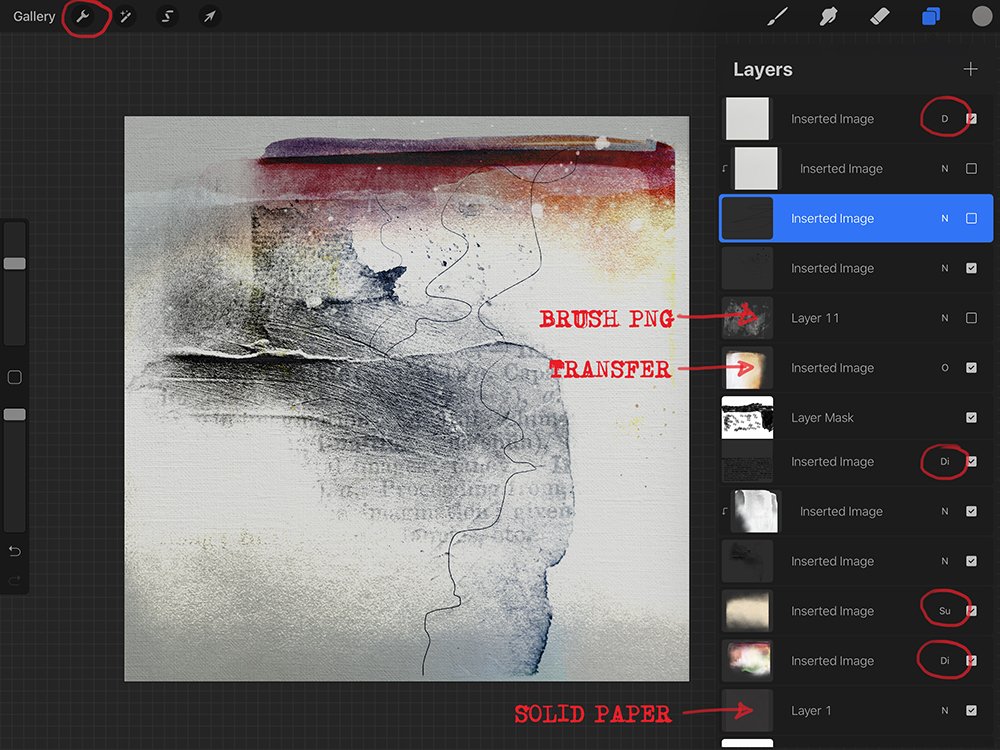
3. Layering Elements
Add multiple Transfer layers and adjust Blend Modes to increase complexity of the design.
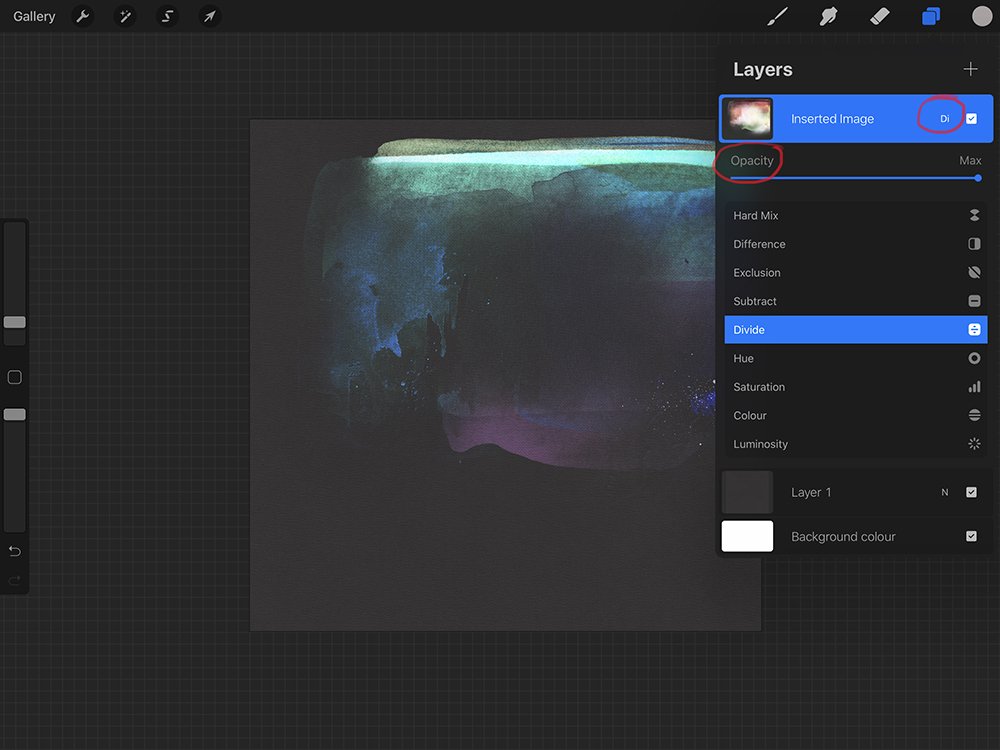
- Tap on the letter ‘N’ next to the ‘check box’ on the Transfer to change the Blend Mode.
- This active a drop-down menu of Blend Mode options.
- Choose a Blend Mode by scrolling through the menu options.
- Modify Opacity by moving the ‘slider’ as preferred.
- Tap on the blue highlighted layer when you are happy with the results to retract the menu.
Note. You can add more Transfer layers by repeating Steps 2 and 3 changing the Size and Blending Mode per choice.
Tip. When you modify the Blend Mode of a layer, the letter on that layer will change accordingly.
For example:
- D = Difference
- S = Soft Light
- DI = Divide
4. Add Brushes
Increase visual interest by adding Brush layers to the design.
- Select the top layer in your Layers Panel.
- Go to the ‘wrench’ icon at the top left-hand side of the screen.
- Tap on Add.
- Tap on Insert a Photo.
- Navigate to the BrushSet .png file of choice.
- Tap on the BrushSet .png file to import onto your layout foundation.
- Adjust size and position by moving the corners of the Bounding Box inwards/outwards.
- Tap on the blue highlighted layer when you are happy with the size and position of the BrushSet layer.
- Tap on the ‘N’ on the highlighted layer to access the Blend Mode drop down menu.
- Play with the different Blend Mode options and adjust Opacity as preferred.
Tip: Repeat this process to add multiple BrushSet layers to increase visual interest and complexity.
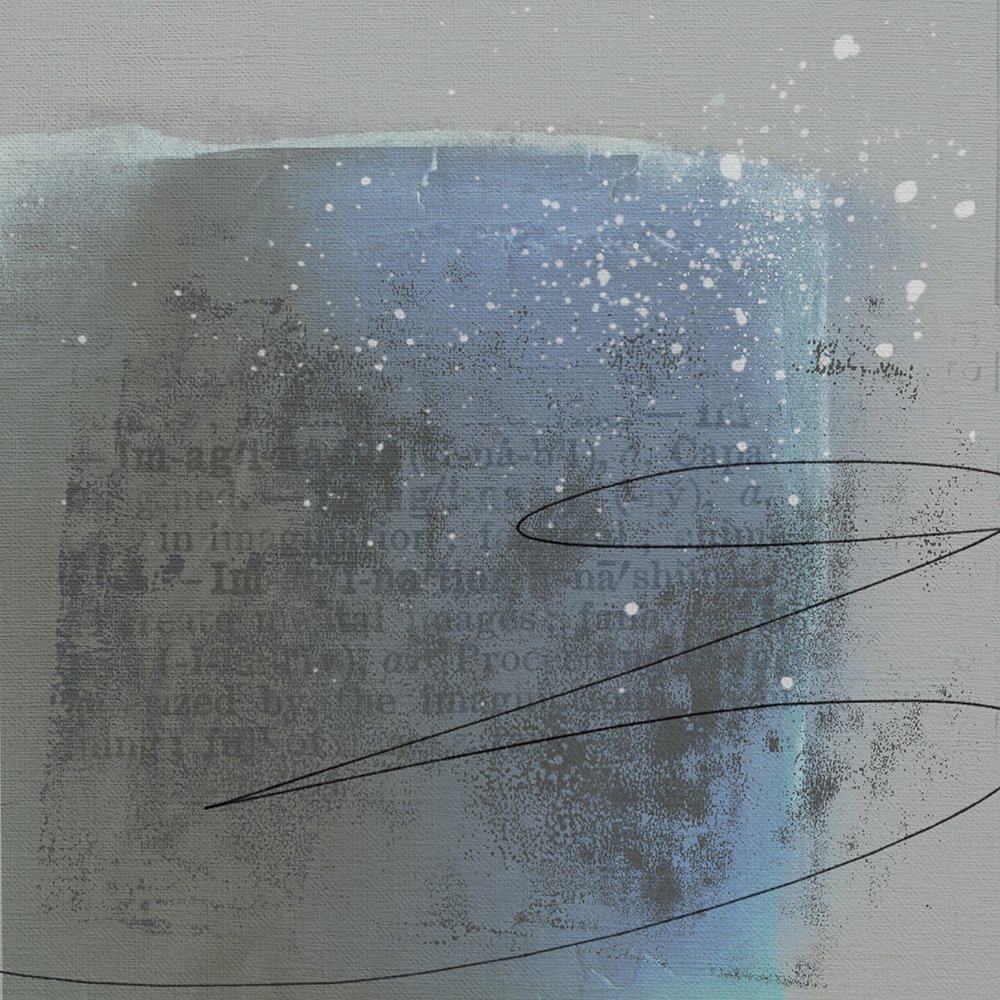
5. Refine The Composition
Adjust the composition by turning the visibility of layers on/off.
- De- and Reselect some of the Transfer or BrushSet layers in the Layer Stack to establish BEST visual results.
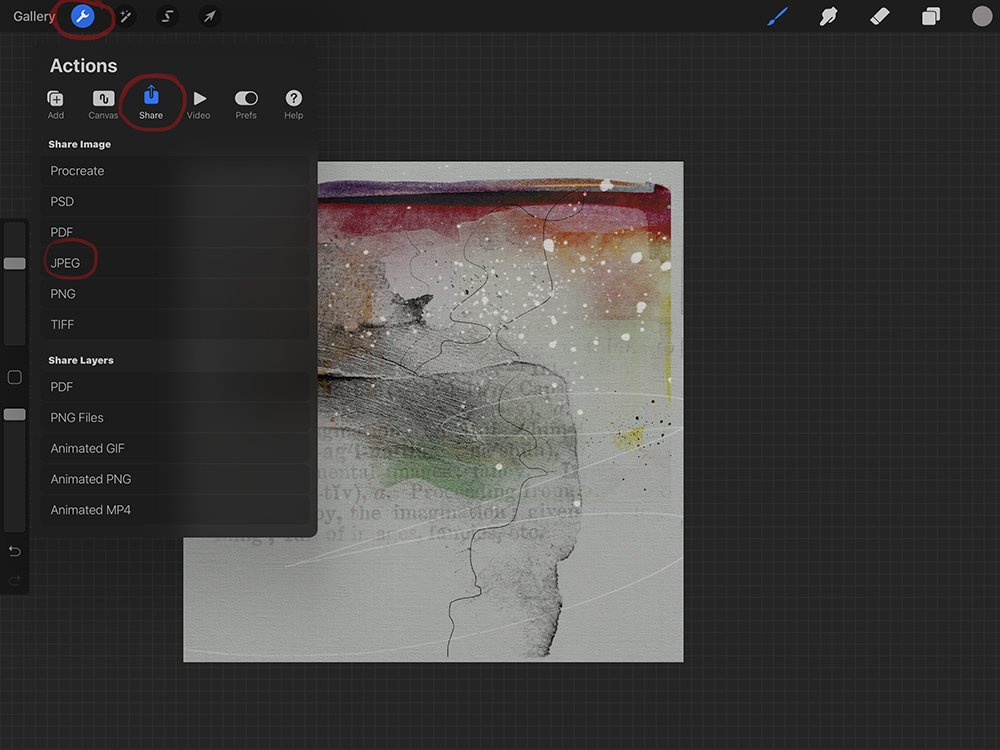
- Save as a .jpg or .png format file.
- Tap on the ‘wrench’ icon in the top left-hand corner.
- Tap on Share.
- Tap on JPG or PNG.
- You will get a message to say ‘Export successful.’
- The next pop up screen will give you various option of where to save your image.
- The easiest is to Save Image which will place the image in your Camera Roll.
Note. You can now return to your image and repeat the process this process of selecting and de-selecting different layers to yield a completely different outcome and more unique backgrounds for your layout designs.
Tip. Import MORE Solid Papers, Transfers, BrushSets, other elements or photos to create another collection of foundational backgrounds for your photo artistry and scrapbooking layouts – Just keep going!
 Summary
Create your own digital papers by combining aA DigitalART with Blending Modes in iPad Procreate.
- Layer multiple elements
- Resize and re-position as preferred.
- Adjust Blend Mode and Opacity effects to augment visual interest.
The key to success is BOTH patience and the willingness to experiment and play.
- Don’t think about the outcome, rather focus on the exciting journey of discovery.
- Playfully build layers starting with a Solid Paper to create your own custom backgrounds.
Note. Follow this process in Photoshop or Elements and combine paper design via Layer Masks and Brushes.
TRY THIS.
- Make 3 unique backgrounds using this process.
- Use these backgrounds to make 3 more backgrounds to add to your collection.
- Experiment and play to spark creativity.
WE INVITE YOU TO:
- Read Digital Paper Overlay Techniques
- Post to the aA Gallery
- See also Dancing Between Devices
And if you liked Custom Backgrounds in iPad Procreate please consider sharing it using the social media buttons below.


This tutorial is well done Dale! I do not have ProCreate yet, but will tag this tutorial for later. Thanks for the detailed information and pictures.
Dale is so creative and the one who got me into Procreate.