

Today Creative Team Member, Miki, is sharing her Levels Color Correction Technique.
This tutorial is for BOTH Adobe Photoshop and Elements.
Levels Color Correction Technique
Introduction
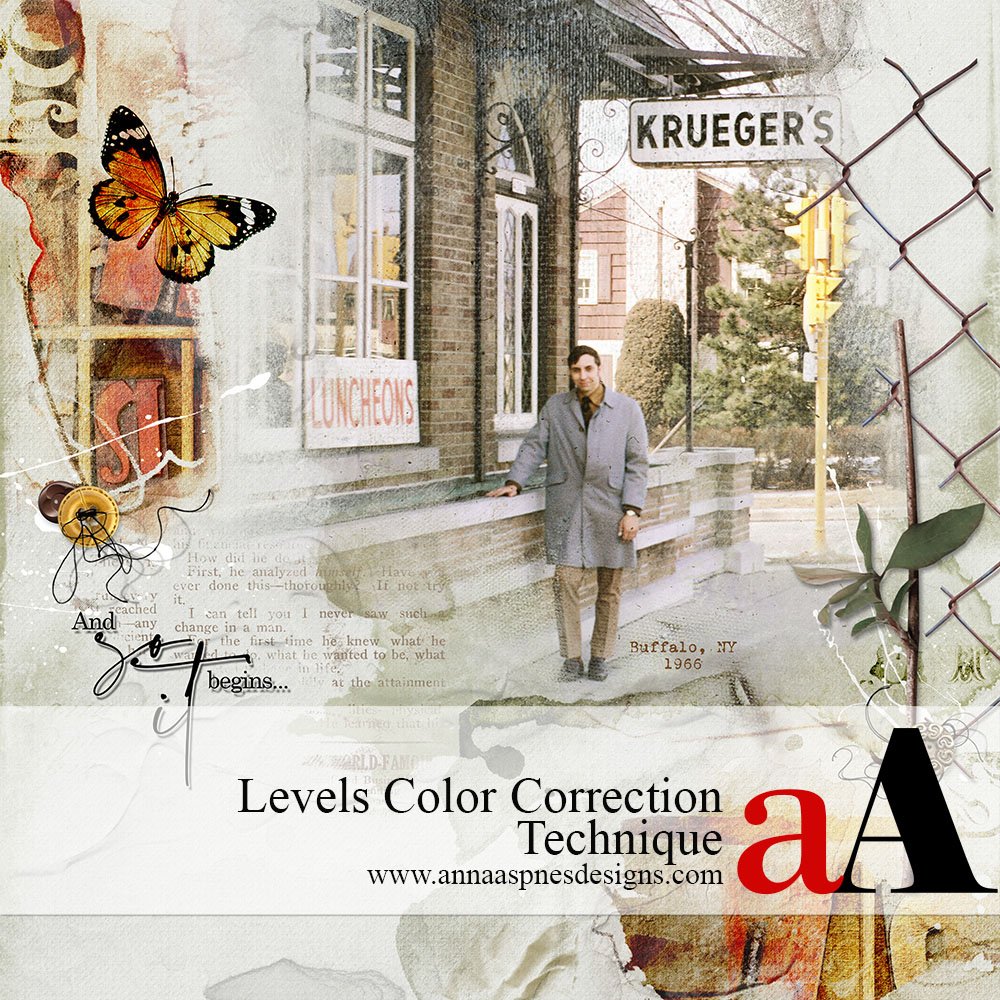
The perfect solution for dark, faded or yellowing old photos.
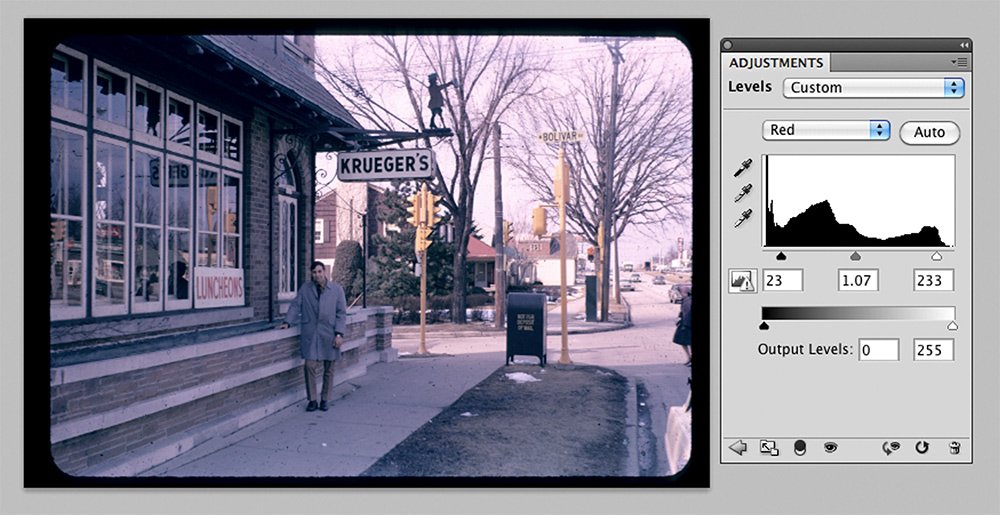
The photo in this digital scrapbooking page was taken 50 years ago and has a strong blue cast.
There are several ways to fix these treasured photos.
You will learn how to use:
- Levels Tool.
- Eye Dropper Tonal Correction.
- Levels Adjustment for adjusting Color Channels.
- Levels to change Exposure and Contrast.
- Use Blending Modes to add contrast and color intensity.
Note. These tools are available in both Adobe Photoshop CS (full version) and Photoshop Elements.
1. Levels Tool
Adjust the tone of an image via a histogram.
- Enables you to view a histogram to change the contrast of an image.
- Levels enables you to change the darkest and lightest portions of the image as well as all the mid-tones in between.
- In Photoshop CS open Image> Adjustment> Levels (CMD/CTRL + L) or by adding a Levels Adjustment Layer from the Layers Panel.
- In Photoshop Elements, Enhance> Adjust Lighting> Levels (CMD/CTRL+L).
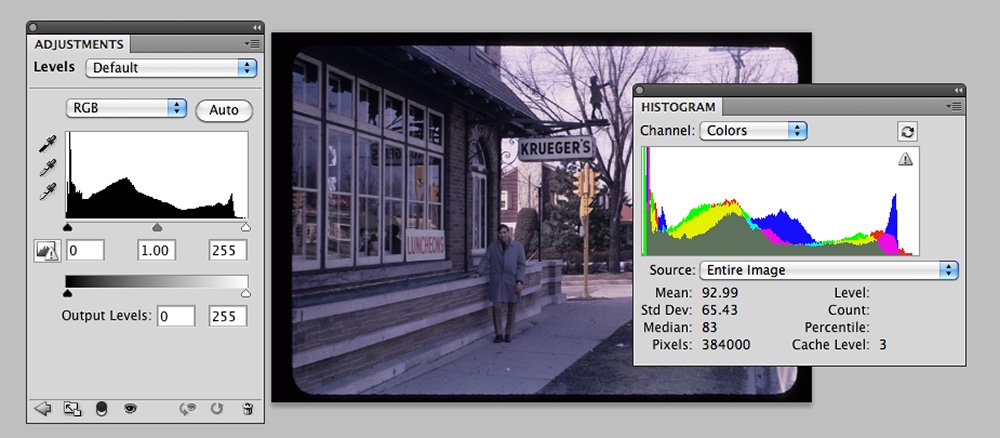
- Drag the slider controls under the histogram in Levels dialog box inward until they’re under the point where the histogram begins to rise in a mountain shape.
Shadows (Black) are on the left side of the Histogram panel and Highlight (White) are on the right.
- The higher the ‘peaks’, the greater that pixel value in your photo.
- In this image, that value is greater on the left side of the Panel indicating more Shadows and therefore Highlights (lighter tones.)
- A balance between Shadows and Highlights creates contrast.
2. Tonal Corrections with the Eyedropper Tool
Use Levels to make tonal corrections to the image in 3 easy steps.
- The LevelsDialog Box offers a way to make tonal corrections to the image.
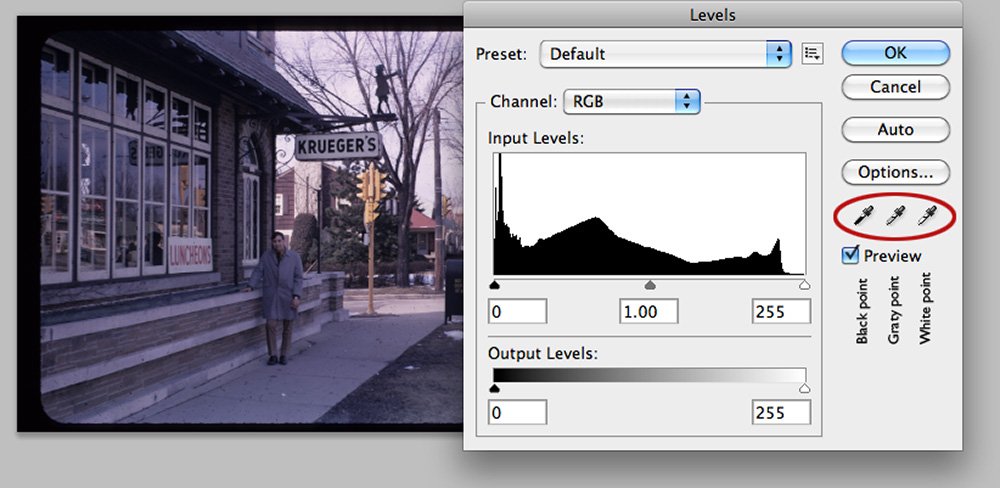
- You can correct both tonality and color by using the three eyedroppers in the LevelsDialog Box.
- Open the image, open the Levels Dialog Box(CMD/CRTL + L) and correct both tonality and color in the image with just three clicks.
- Select the BLACK POINT eyedropper and click on an area of a photo that should be BLACK or already DARK in color.
- Select the WHITE POINT eyedropper and click on an areaof a photo that should be WHITE or very LIGHT in color.
- Click the GRAY POINT eyedropper on an areaof a photo that should be GRAY.
- Repeat this process to correct the colors in your artistry or photo.
3. Custom Levels Adjustment Using Color Channels
Use Color Channels to correct a color cast.
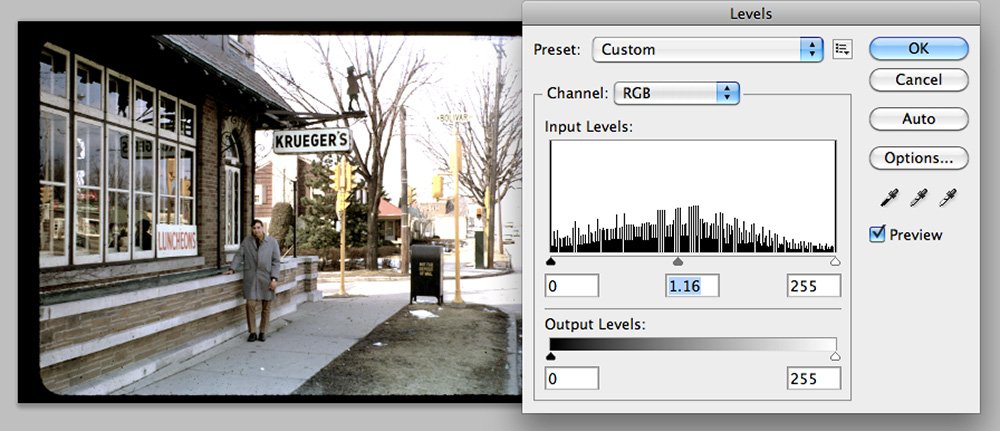
- In the Levels dialog box, click on ‘RGB’ to activate your options and open the three individual color Channels.
- Select RED then move white slider LEFT and black slider RIGHT to the area where the histogram begins to ‘peak.’
- Now select GREEN from the menu and repeat.

- Repeat for the BLUE channel.
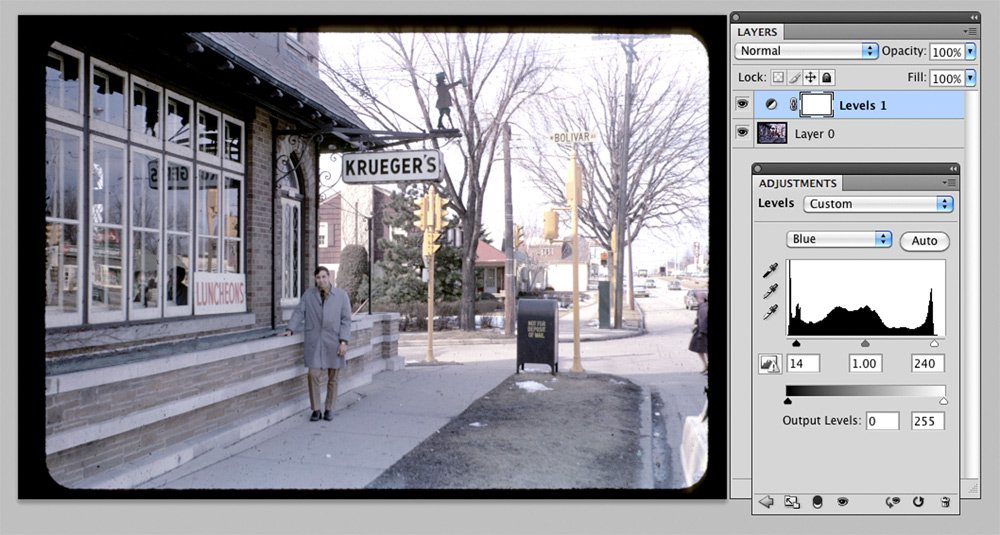
Note. This will only create a result if there is a color cast in your image. If there is no color cast, the histogram will spread to the edges of the graph.
4. Adjust Exposure and Contrast
Use the Levels Tool to adjust the exposure and contrast of a photo.
- Make the Shadows, Highlights, and Mid-tones brighter/lighter or darker.
- Using the RGB Channel, move the Highlights (white slider on the right) to the LEFT to make the whites in your photo brighter.
- Repeat for the Shadows (black slider on the left) to the RIGHT to darken the blacks in your image.
- Adjust the Mid-tone slider to add contrast and perfect your levels adjustment.
Tip. Make sure that you don’t overexpose the Highlights (make them TOO light) and/or underexpose the Shadows (too dark).
Note. This is called ‘clipping’ – Hold down the OPT/ALT key while you’re adjusting the white and black sliders to ensure you’re not obliterating pixels.
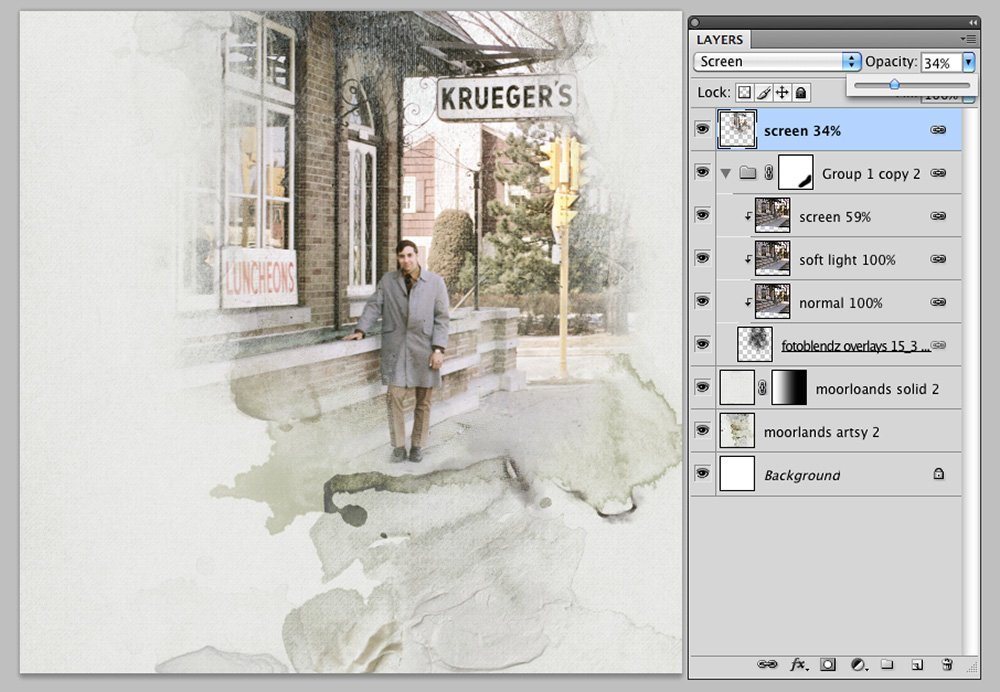
5. Color Adjustments Using Blending Modes
Further adjust the contrast and intensity of color in your artistry using Blending Modes.
- Duplicate the photo layer in the Layers Panel(CMD/CTRL + J).
- Repeat two or more times.
- Change the Blending Mode of each layer from the ‘Normal’ menu at the top of the Layers Panel.
- Apply Screen to LIGHTEN your photo.
- Apply Soft Light to DARKEN your photos
- Adjust the Opacity to yield best effect.
Summary
You can use the Levels Tool to improve the appearance of your photos.
- Remove a color cast using a variety of tools.
- Increase the contrast of an image.
- Improve color
DigitalART Supply List
- Brush Set Bundle No. 4
- Splatters No. 8
- Edgers No. 2
- Spackle Textured No. 10
- Artplay Palette Moorlands
- Artplay Palette Patriarch
- Artplay Palette Hinge
- Artplay Palette Archive
- Artplay Palette Fare
- Artplay MiniPalette Biblio
- Artsy Transfers Archive
- Button Threadz No. 3
- Autumn WordART Mix No. 5
And if you liked this tutorial, Levels Color Correction Technique, please consider sharing it using the social media buttons below.


Love the example layout! Thanks, Miki, for the thorough steps and screen shots. Going to open this post and refer to it next time I work with a discolored vintage/retro photo!