

Creative Team Member, Laura, shares how to use one photo with multiple frames in this multi-framed photo tutorial for Adobe Photoshop or Elements.

In this multi-framed photo tutorial, I will clip one photo to two frames in a template.
It’s a useful technique for adding visual unity and flow in a sequence of pages, highlight a fantastic photo or disguise one that is not so good.
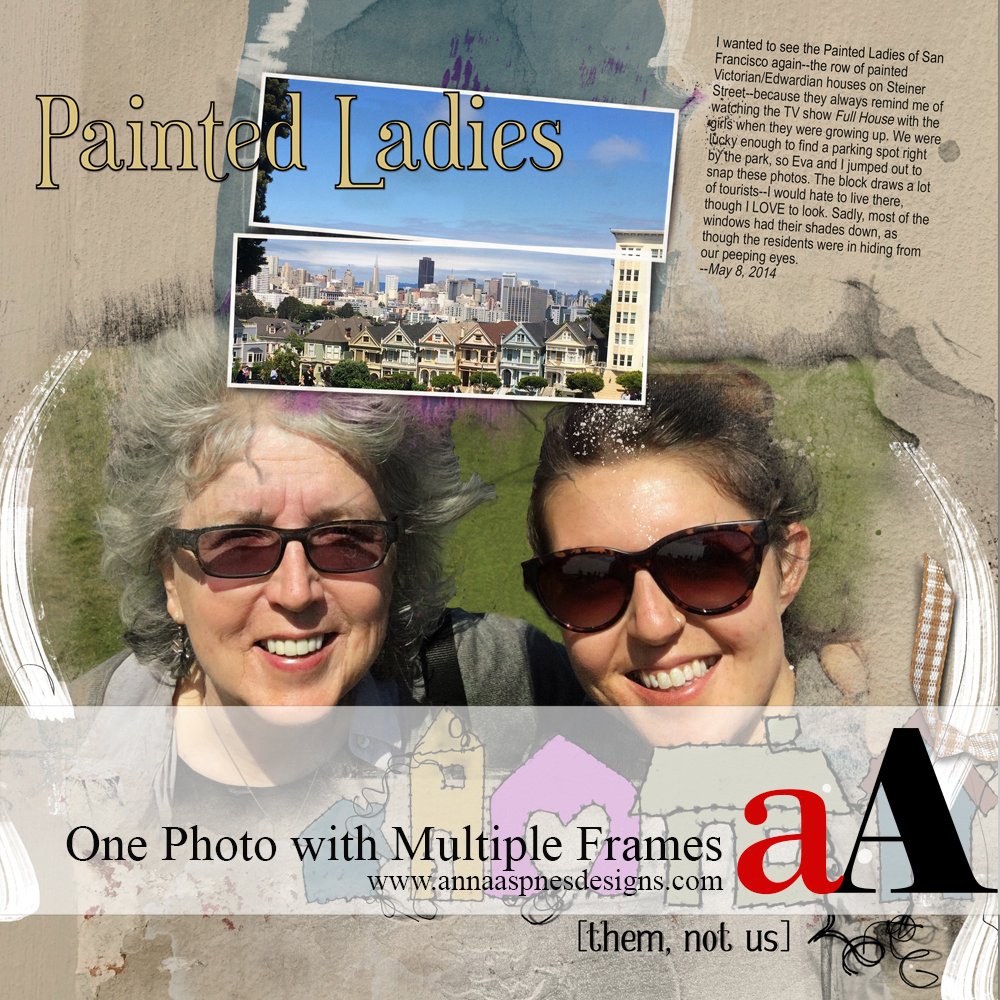
In this case, I’m using a difficult photo—one captured looking down at the subject, San Francisco’s famous “Painted Ladies” houses, from the park lawn across the street. The lawn cut off the bottom parts of the buildings so I decided to focus on the feeling of viewing the houses with my daughter under a big beautiful blue sky rather than on the architecture of the houses themselves.
You don’t have to limit yourself to using two frame masks, nor do you have to use a template—You just need to have a frame with a mask layer to which you can clip your photo to. This can be a FrameMask or a FotoBlendz clipping mask.
In this multi-framed photo tutorial, I’m using Artsy Layered Template No. 225, which was rotated by 90 degrees to change the orientation of the frames.
Multi-Framed Photo Tutorial
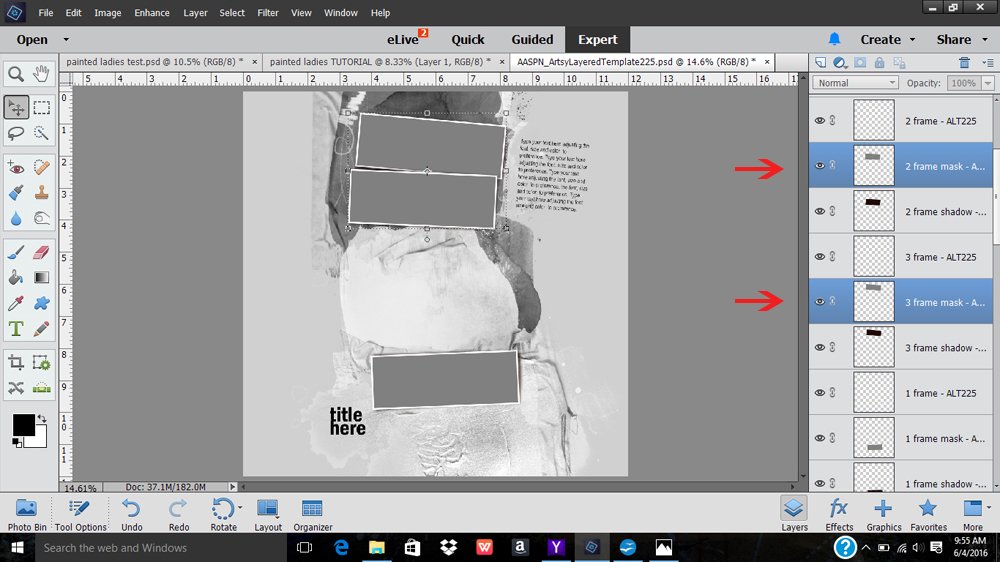
1. Open your template. Save it under a new name so you don’t accidentally overwrite your template file. In the Layers panel, click on your first frame mask. Then CTRL + Click on the second mask layer to also highlight.
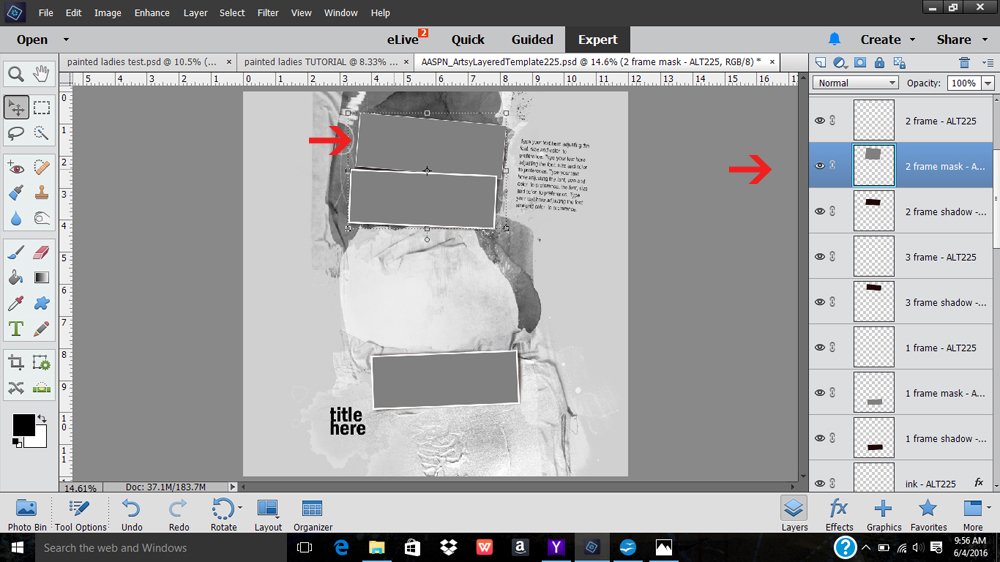
2. Merge the Mask Layers. Go to Layer> Merge Layers.
Notice that the frame on the top has dropped behind the frame on the bottom. To make it visible, drag the frame layer upward in the layer stack.
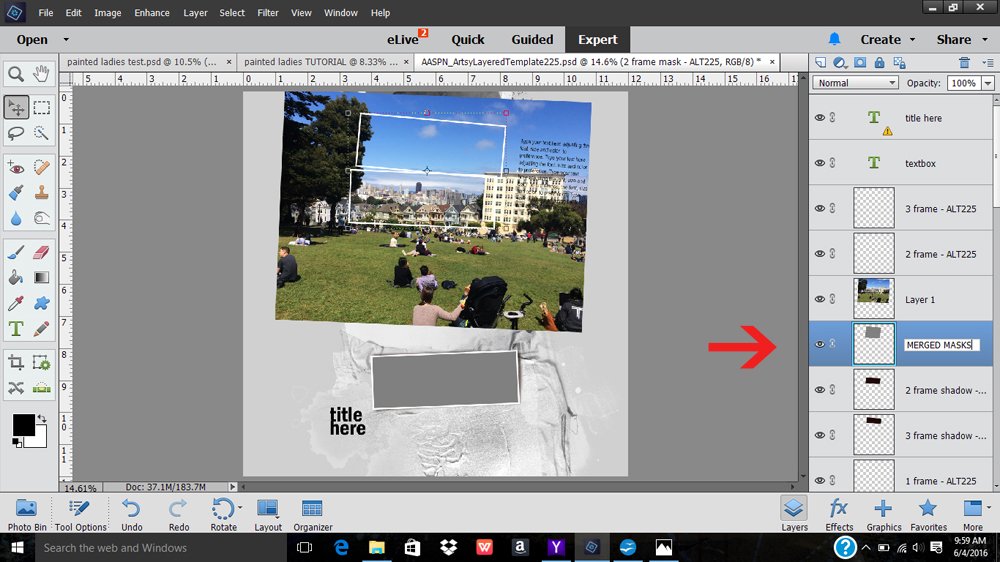
3. Add Photo. Position your photo over the merged frame masks layer. You will see the frames are now on top of your photo.
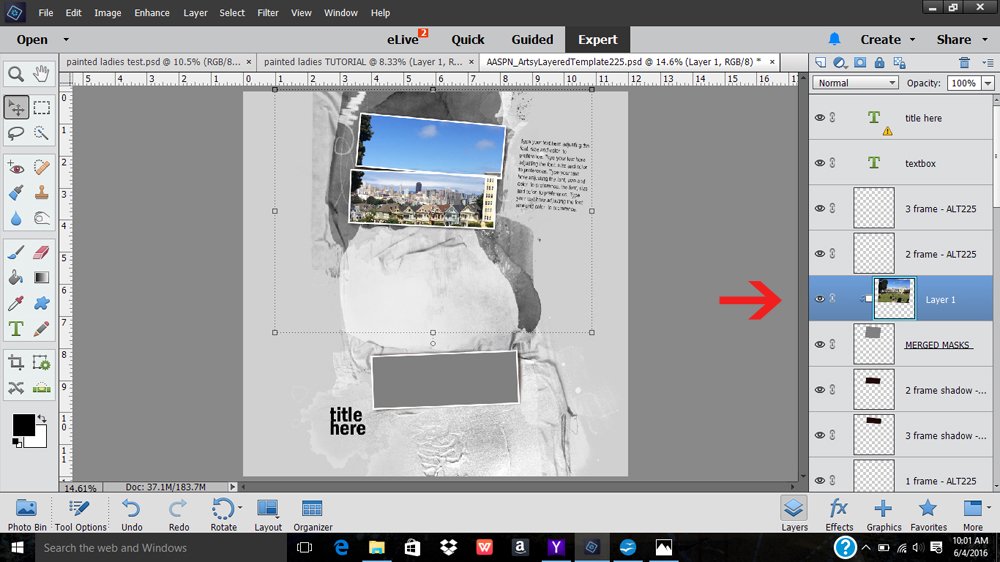
4. Clip Photos. Press CTRL/CMD + G (Elements) or CTRL/CMD + ALT/OPT + G (Photoshop) to clip the photo to the merged mask layer. You will see a downward-facing arrow next to the photo, indicating that the photo is clipped to the layer beneath.
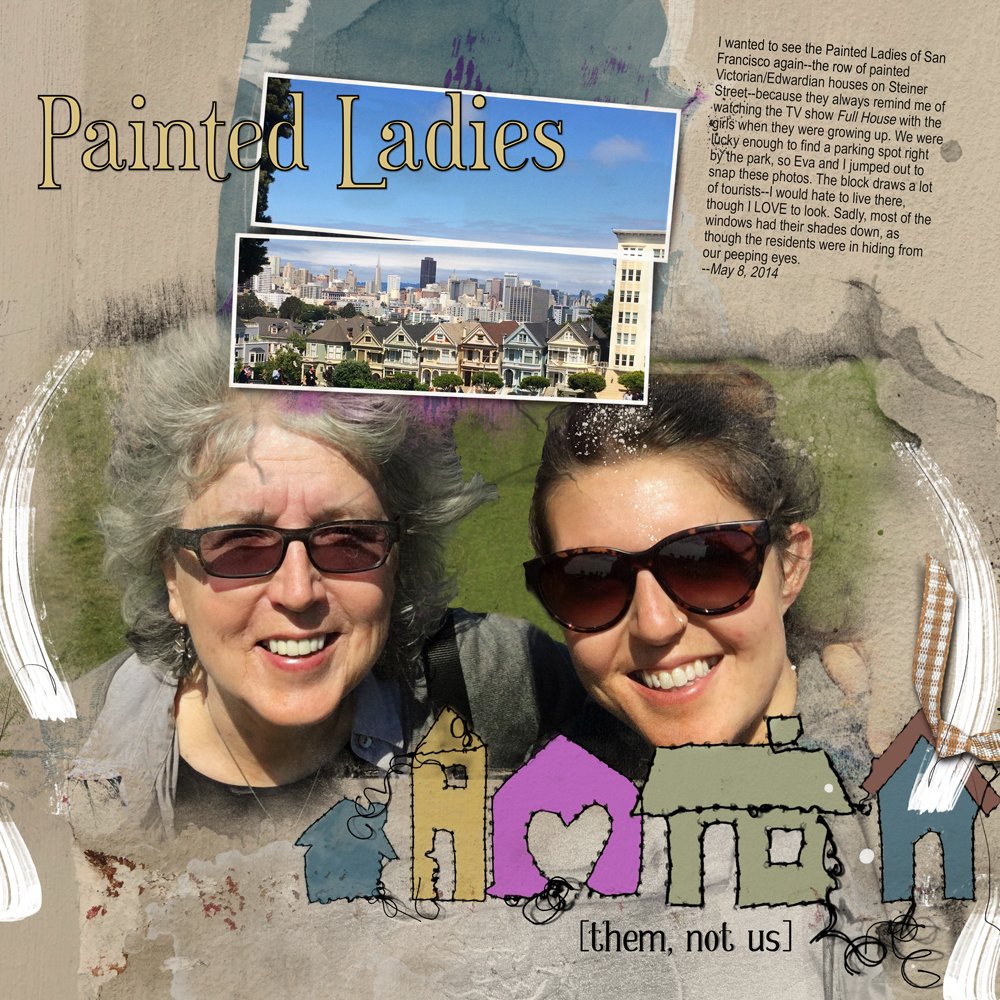
5. Embellish. Finish your layout as desired. I deleted the frame that was on the bottom of the template and adding a row of “Painted Ladies” houses instead, which I made using UrbanStitchez Home No. 1.
Click on the above photos for additional process notes and Anna Aspnes Digital Designs supplies used.


Recent Comments