

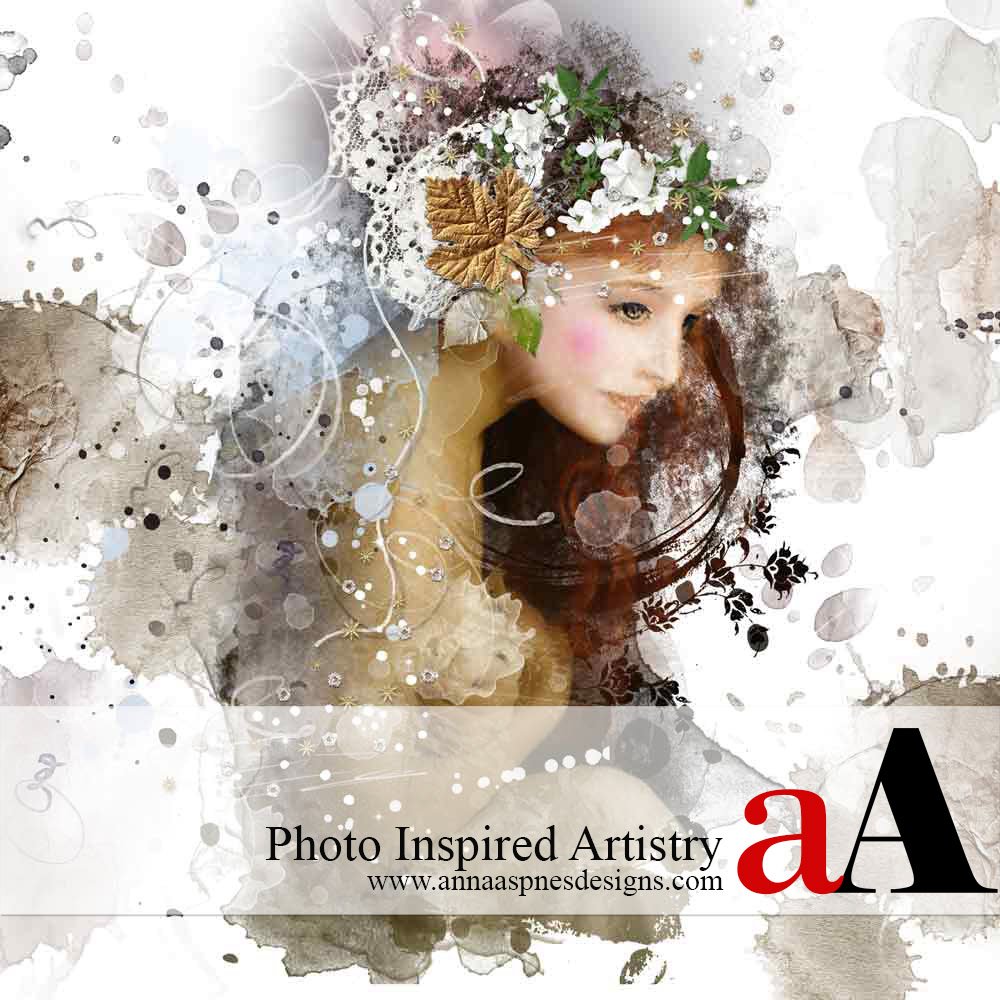
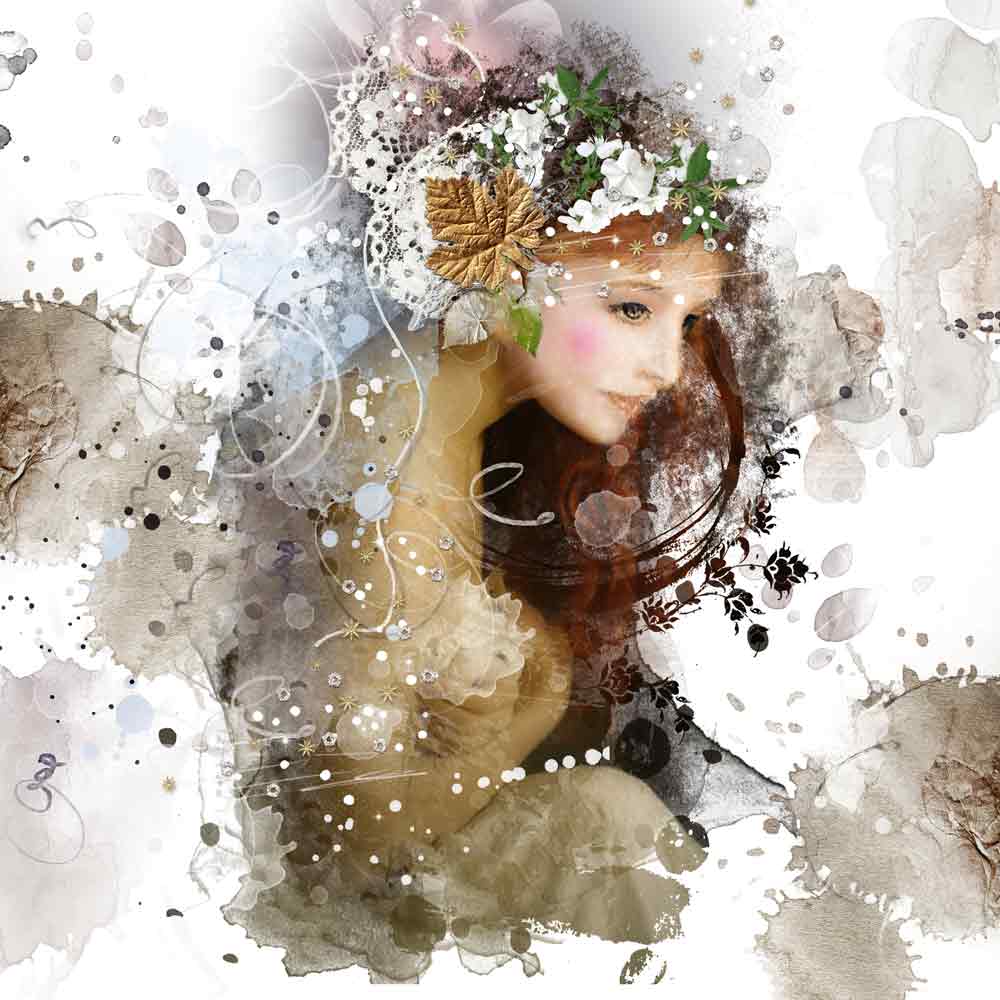
Today, Creative Team Member, Trish Hoskin, is sharing a Photo Inspired Artistry.
Photo Inspired Artistry
Introduction
Use ArtPlay Palettes and Mutlimedia Element to create digital artistry.
Create a piece of Art which can be:
- Printed for a wall.
- Uploaded and printed on products such as pillows, stationery, and even bedding.
There is no end to the versatility.
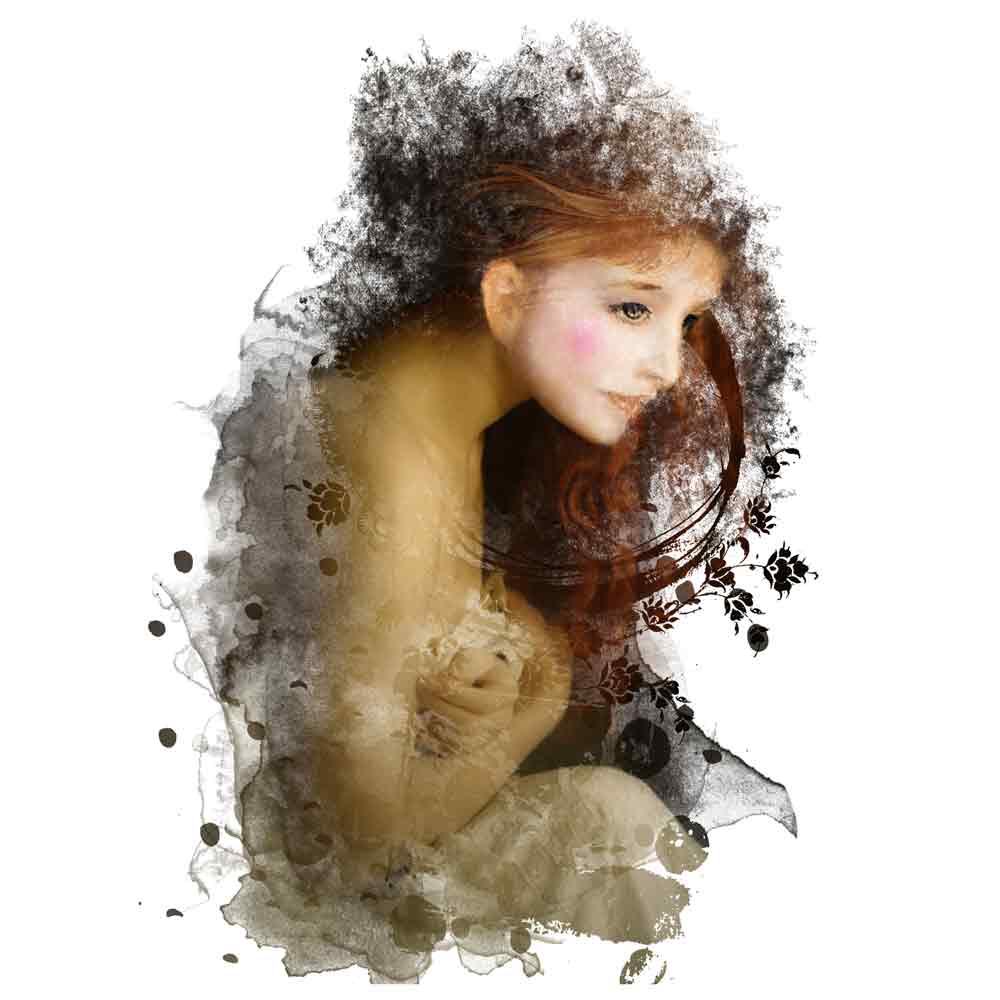
Step 1. Image Selection
Choose a photo to serve as a foundation for the artistry.
- Take your own photos or download from websites that provide stock images.
- Photos are copyrighted property so check the license or Terms of Use to ensure you have the right to use them.
- Pixabay is a great place to find images that you can use in your photo artistry.
- Select photos that you find interesting or inspire you.
Step 2. Mask Image
Add creative edges to your image using filter effects and blending techniques.
- Use a Filter, such as Poster Edge, or run your photo through an App to edit your photo.
- Blend the edges of the image using interesting BrushSets such as those from ArtPlay Palettes and ToolSets, with the Paint Brush Tool and Layer Mask.
Step 3. Product Matching
Choose a selection of DigitalART products that coordinate with your photo.
- Consider the COLOR and THEME of the photo, as well as the MOOD or feeling you want to convey in your artistry.
- Think about the TYPE of products that will best support your image.
- Select DigitalART products that offer a variety of Element Properties.
Note. Some favorites include interesting ToolSets, such as paint or stains, textural components or dimensional embellishments, for example.
Step 4. Create Foundation
Establish a New Layout in the size of preference.
- Choose a standard size for ease of on-line printing.
- Square or rectangle.
Note. Trish typically begins with a New Layouts 2000 x 3000 pixels at 300 DPI, or 1200 x 1200 pixels at 300 dpi depending on the SIZE of the image selected.
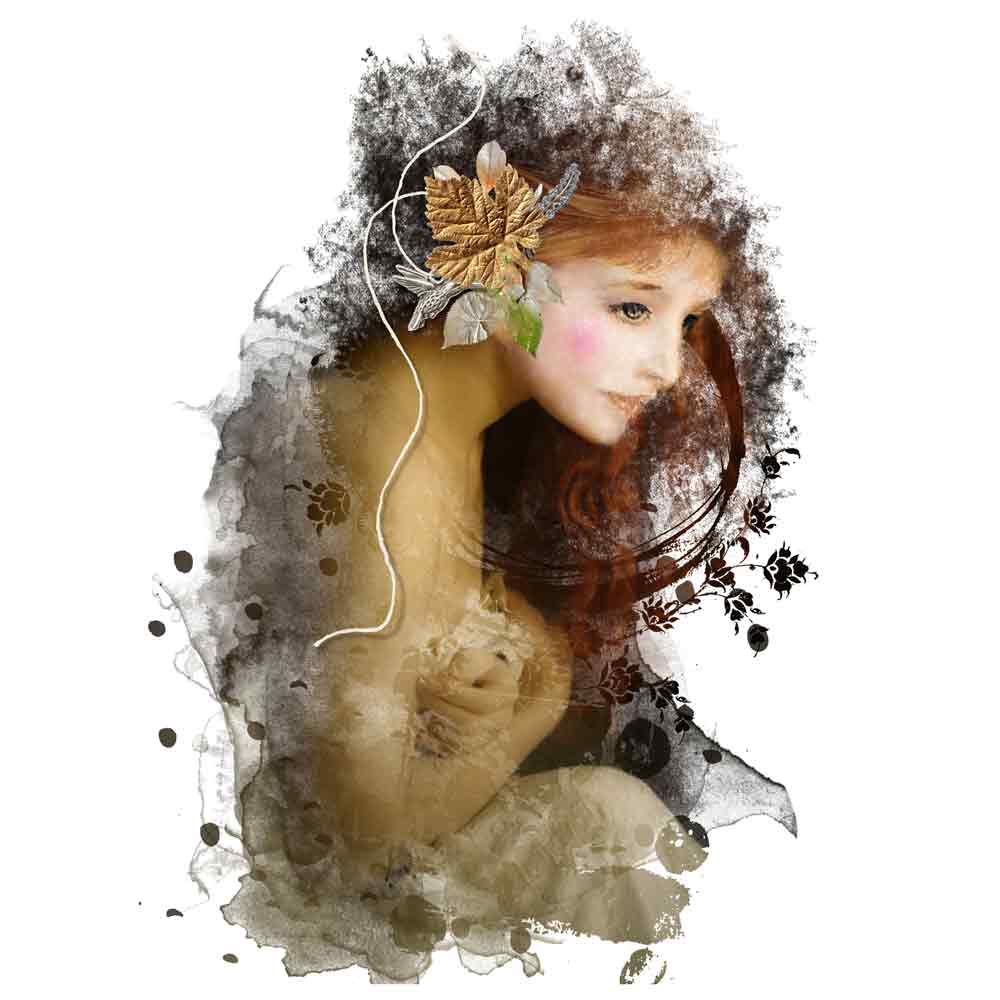
Step 5. Establish Focal Point
Use Elements to embellish and draw the eye to the focal points of the image.
- Place elements over the areas of you photo to guide the viewer’s eye.
- Notice how the flower also has an ornate component in supporting the subject.
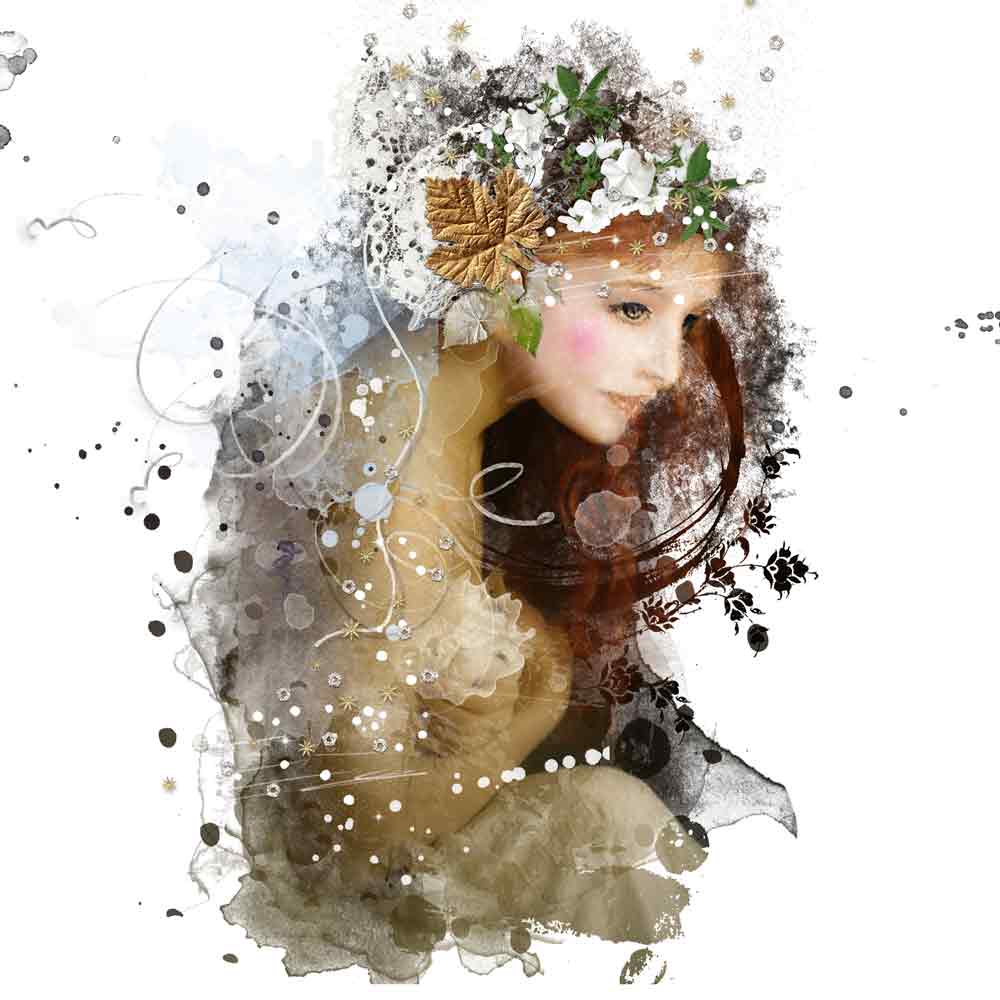
Step 6. Complexity in Layers
Add more elements to build visual interest in the layout design.
- Add brushwork using BrushSets such as ArtsyStains and Splatters.
- Layer Transfers and Overlays from ArtPlay Palettes.
- Add dimensional components from MultiMedia and ArtPlay Palettes.
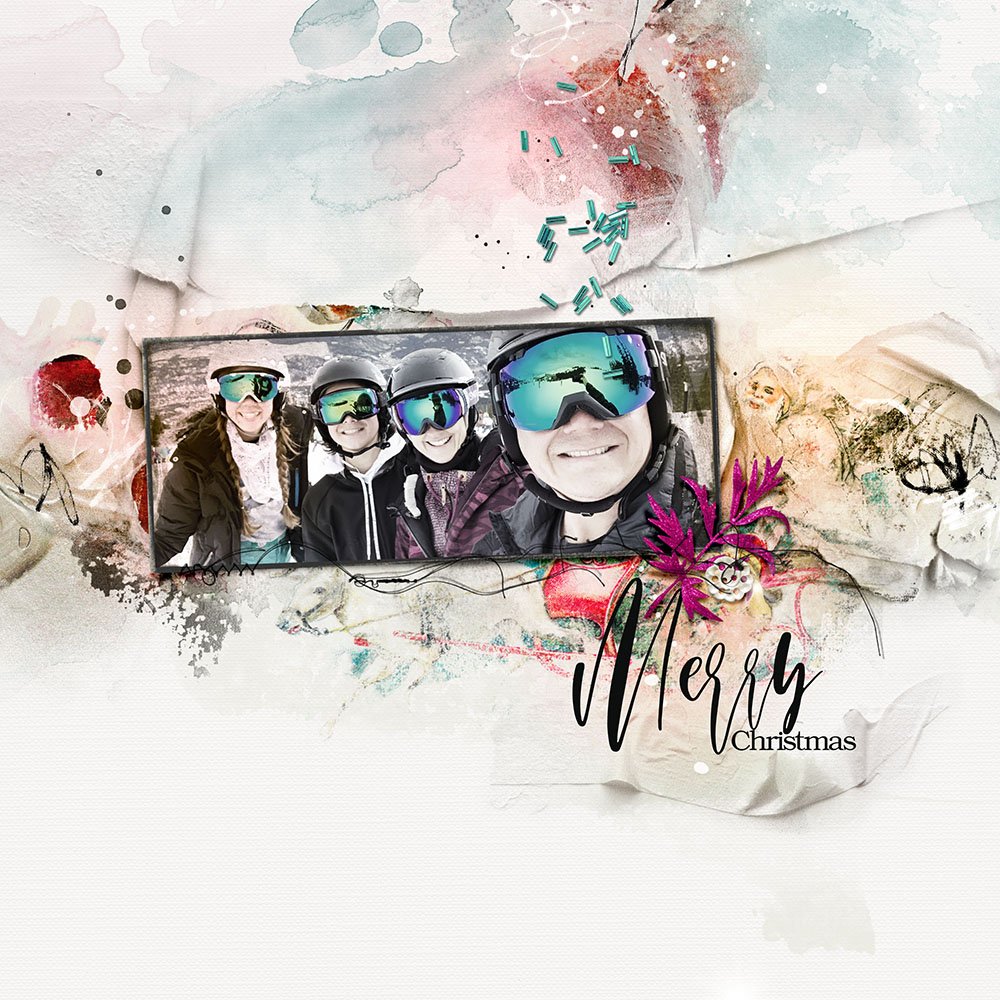
Note. See full list of DigitalART supplies used in this layout.
 Step 7. Frame with More Layers
Continue add layers to create BALANCE in your design.
- See Design Principles and Element Properties for guidance in creating BALANCE (and CONTRAST) in your digital scrapbooking and photo artistry layout design.
- Place new elements spanning outwards to the edges of your ‘canvas’ to anchor the design.
- Choose elements based on Color and Theme of your image.
Summary
You can create photo inspired artistry using aA DigitalART:
- Lead your design with a photo.
- Use a Layer Mask and Brushes to ‘artsify’ your chosen image.
- Support your edited image with aA DigitalART.
Note. Preselect aA DigitalART supplies can save you a LOT of time in the design process.
DigitalART Supplies
And if you liked this Photo Inspired Artistry tutorial, please consider sharing in the Oscraps Gallery, on Pinterest or in the Anna Aspnes Designs Facebook Group.


Lovely transformation using Anna tools and embellishments! Thanks for the inspiration, Trish!
Love the you comment each week Marnie in support of the aA Creative Team members who share their talent in this space 🙂
Love how your figure appears to be so calm in comparison to the “movement” of all the beautifully layered elements in this piece. Great tutorial Trish xx