

Today, Creative Team Member, Lou Ann Donahue, is sharing a Simple Sketch Inspired Layout.
This tutorial is created in Adobe Photoshop.
Simple Sketch Inspired Layout
Introduction
Use your artistry and scrapbooking to find creative joy in life.
- Living with anxiety with the current world situation and also an earthquake in my area, my creativity has waxed and waned.
- I have found even with a simple piece of art I can take myself to a safe place with my art.
1. Focus on Simplicity
Keep it simple when you are short on creativity.
- Create a File> New Layout and choose a size for your design.
- Select a digital paper for your layout foundation or background.
- Establish a focal point using a photo, brush or sketch
Note.
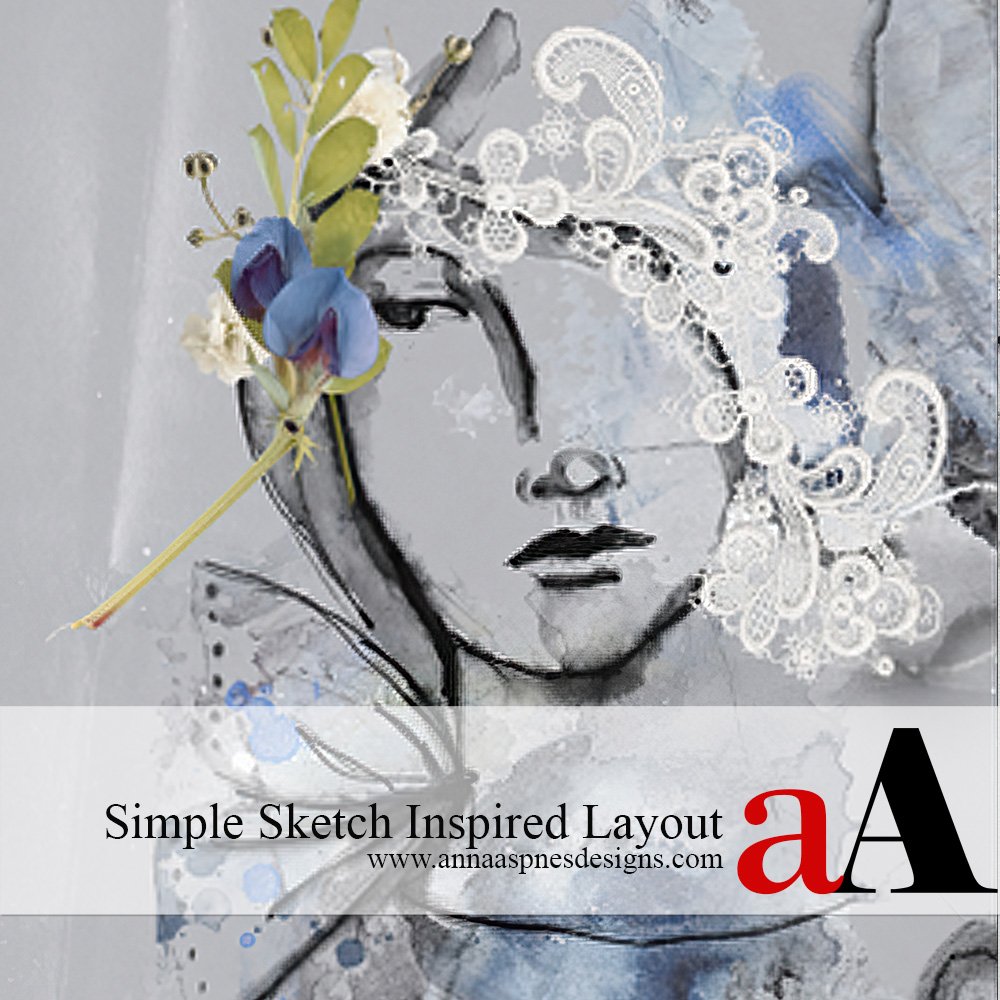
- This layout was created at 9 X 12 inches 300 PPI.
- Solid Paper #2 from ArtPlay Palette Disquiet was selected for the layout foundation.
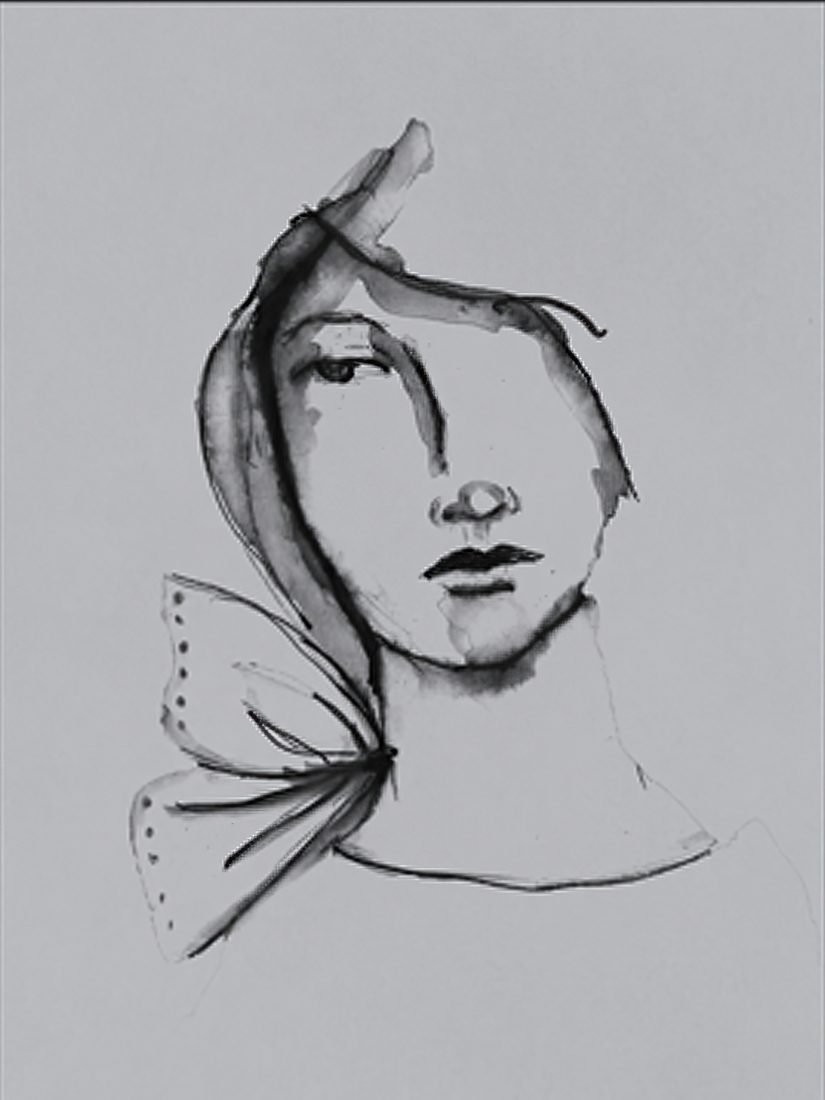
- I wanted to focus on something hopeful so I chose this sketch from Li Li Wee.
- You could also draw scan your image and import into Adobe Photoshop.
 2. Embellish with Transfers
Using Transfers and Overlays from ArtPlay Palette to add visual interest.
- Select and position Transfer #2 from ArtPlay Palette Disquiet in the upper right corner of the layout design
- Open Transfer #4 from ArtPlay Palette Disquiet and Edit>Free Transform.
- Change the size of the element via CLICK-DRAG-RELEASE the corners of the Bounding Box.
![]()
3. Add Dimension and Interest with Elements
Use elements to add depth to you layout design
- Add Splatter #1 from ArtPlay Palette Disquiet and go to Edit>Transform>Rotate as preferred.
- Choose LaceB.png file from ArtPlay Palette Disquiet to create a ‘hair piece’ and rotate as needed.
- Duplicate LaceB.png via Layer>Duplicate Layer, and then Edit>Transform>Rotate to place for ‘bangs’ or ‘fringe’ at top of head.
- Add BabyBreathB.png from ArtPlay Palette Disquiet and place FoliageB.png from ArtPlay Palette Disquiet.
- Position both element to expand on the the head piece of the illustration.
- Erase part of stem from FoliageB.png using the Eraser Tool.
- Go to Image>Adjustments>Invert to change the color of Brush #15 from black to white.
- Position in the left corner of the layout.
- Place element #5 from MultiMedia Birds No. 1 on the stem of FoliageB.png.
![]()
Summary
Create a digital layout in 3 simple steps to calm anxiety and add a little joy into your day.
- Establish a layout foundation.
- Select a focal point.
- Embellish with aA DigitalART elements.
WE INVITE YOU TO:
- View Dancing Between Devices
- Watch Easy Artsy Digital Scrapbooking
- Read How to Create Simple Digital Art
POST YOUR PAGES USING THESE VIDEO TECHNIQUES IN THE ANNAGALLERY.
And if you liked this post, please support us by sharing it using the social media buttons below.


Recent Comments