

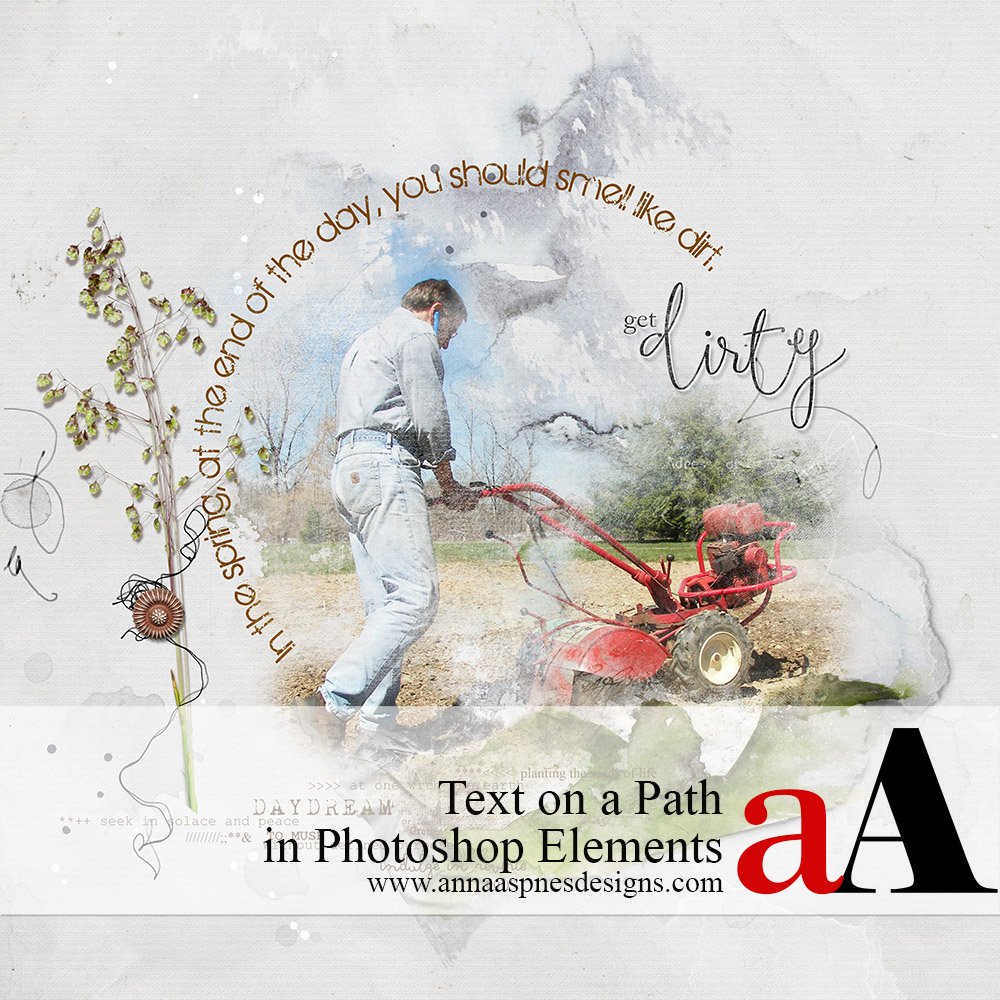
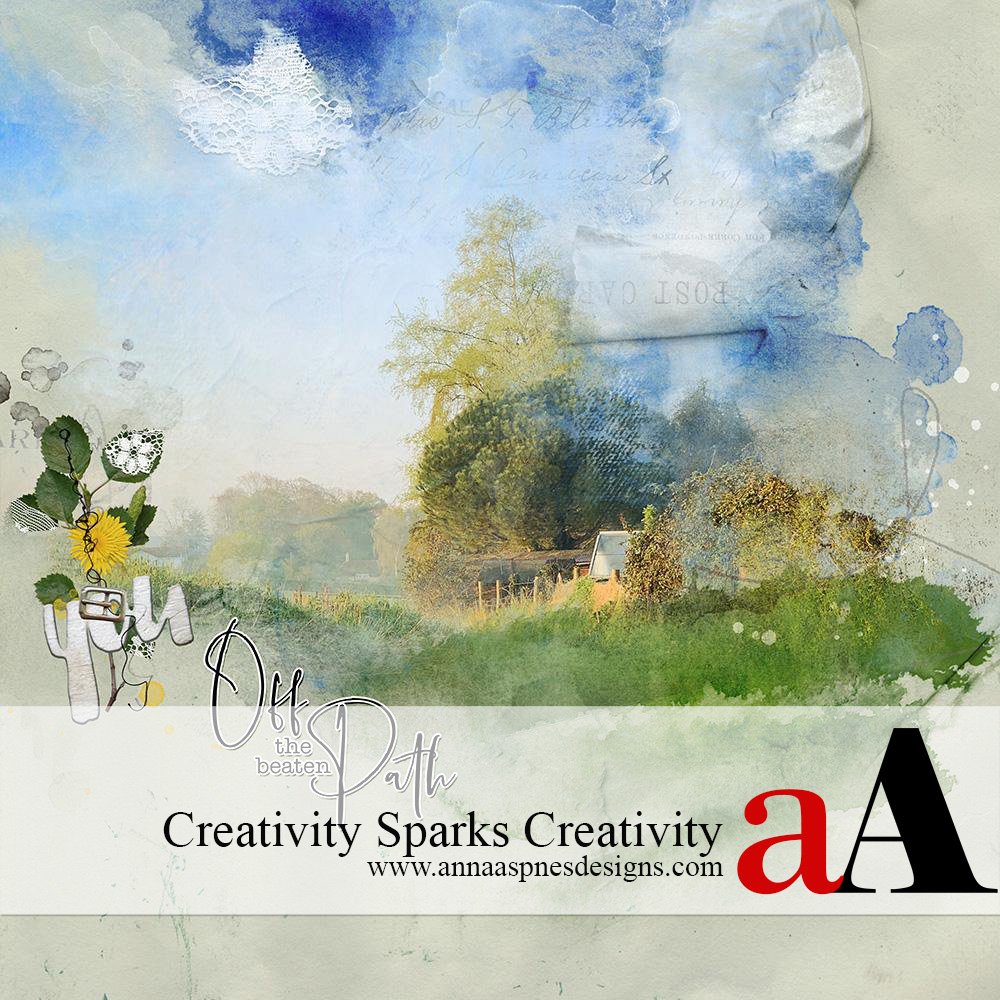
Today aA Creative Team Member is sharing how to create Text on a Path in Photoshop Elements.
Text on a Path
Introduction
Learn how to place text:
- Around a Shape
- On a Selection
- On a custom Path
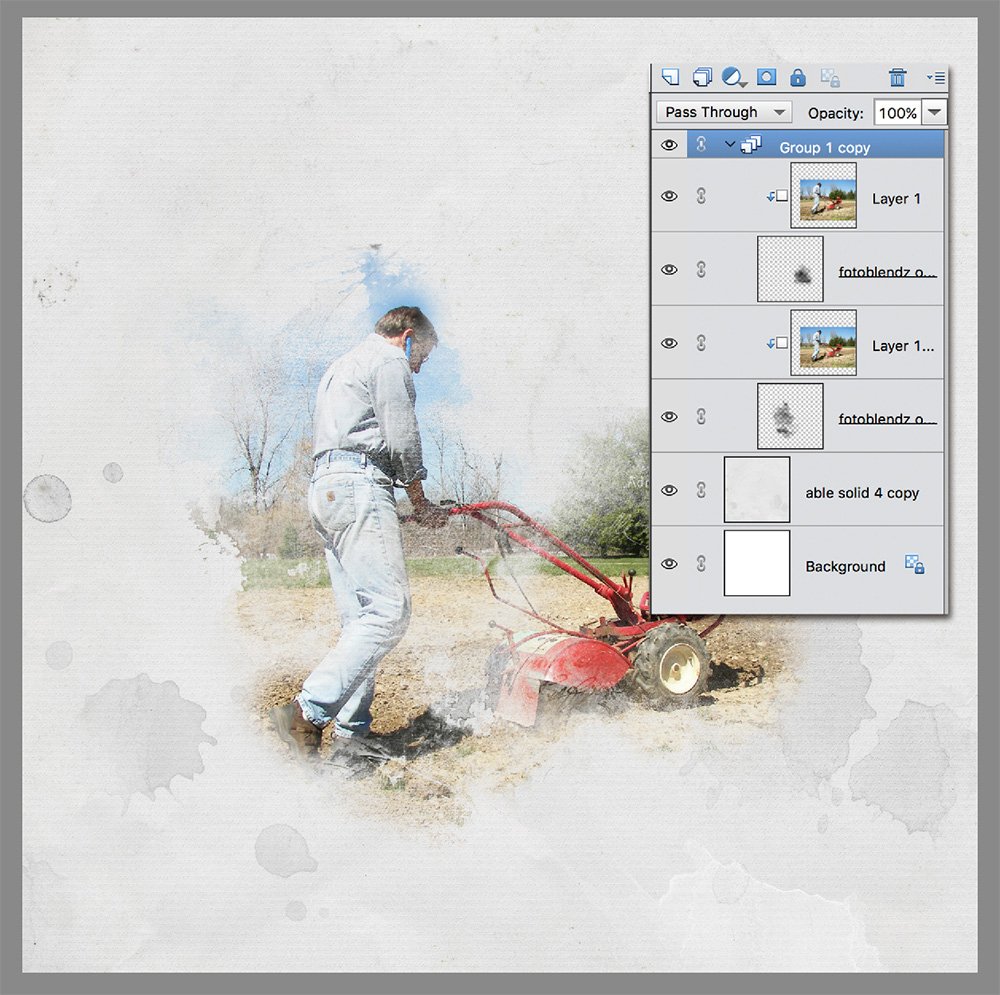
1. Create Layout Foundation
Establish a layout foundation using an Artsy Paper and a photo clipped to a FotoBlendz Mask.
- Go to File> New and create a New Layout at 12 x 12 inches, 300 PPI.
- Open a digital paper from an Artplay Palette into the workspace.
- Move onto the layout foundation using the Move Tool from the Tools Panel.
- Add a FotoBlendz clipping mask to the layout foundation.
- Select photo of choice and move the photo layer on top of the mask.
- Clip the image to the mask with Layer> Create Clipping Mask.
- Resize the photo or FotoBlendz clipping mask layer as outlined in the Use Techniques in Photoshop and Elements video.
Tip. See Modify Clipping Masks for everything you need to know about using FotoBlendz to achieve successful photo blending.
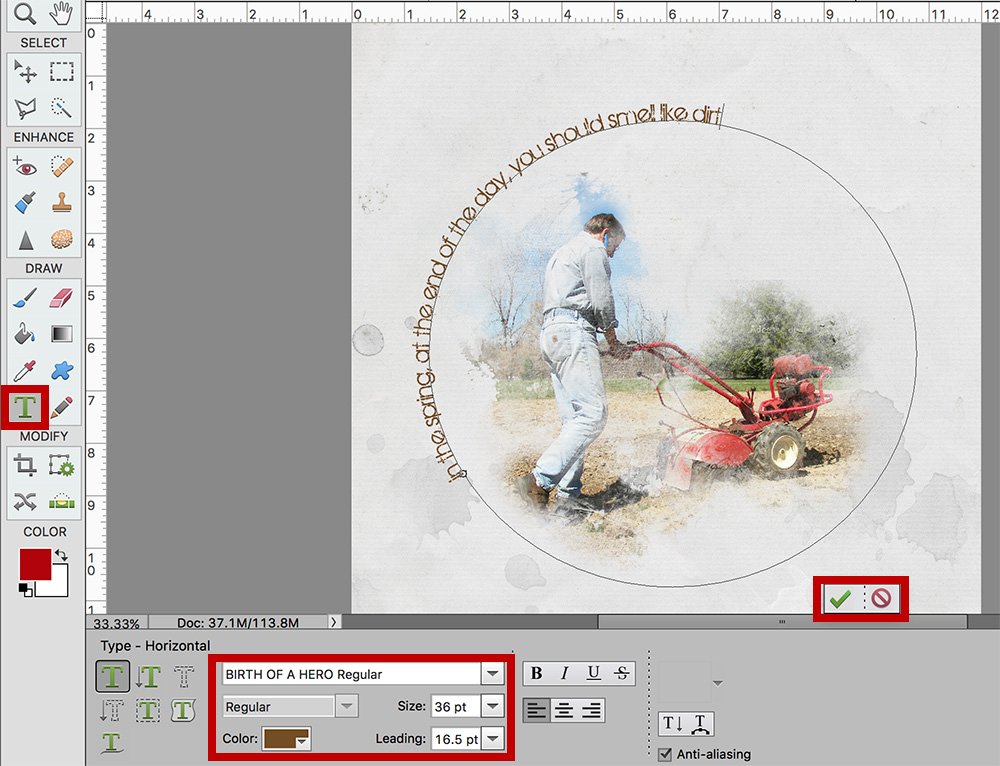
 2. Text on a Shape
Create a shape and add text so that it follows the outline of the shape.
- Select the Type Tool from the Tools Panel.
- Choose the Text on Shape option at the bottom of your screen.
- Select the Shape option of choice and create a Shape.
- Hover the mouse over the path until the cursor icon changes to depict ‘I-Bar’ cursor icon.
- Click on the Shape outline to select a point for your text to begin.
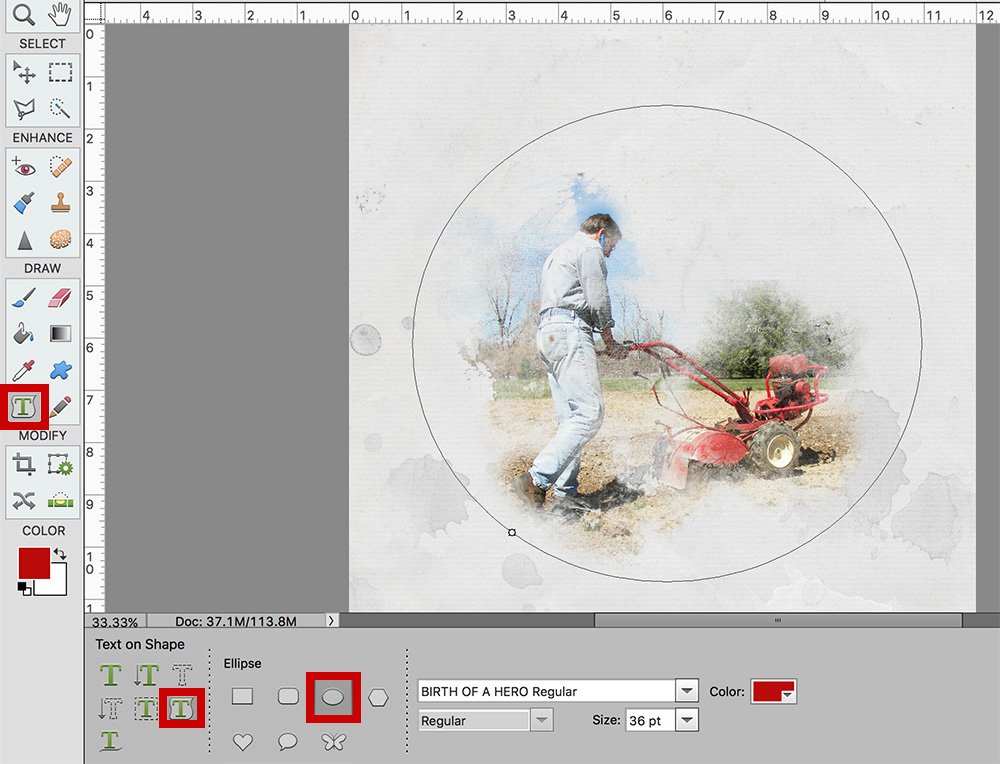
- Type or paste text as prefer.
- Click on the ‘Check Mark’ on the Bounding Box to accept the transformation.
Note.
Change the position of where the text begins on the outline of the shape, or whether it tracks on the inside/outside of the Shape:
- Click your cursor within the text.
- Hold down the CTRL/CMD key and hold down the LEFT mouse button to change the cursor into a ‘double-sided’ arrow.
- Move the text around, in or outside the edge of the Shape to reposition the text.
- Release the CTRL/CMD key when you are happy with the results.
3. Text on a Selection
Create a selection, convert to path and add text so that it follows the outline of the shape.
- Select the Type Tool from the Tools Panel.
- Choose the Text on Selection option at the bottom of your screen.
- Place the cursor on the ‘subject’ or ‘object in your image and drag the cursor to create a selection.
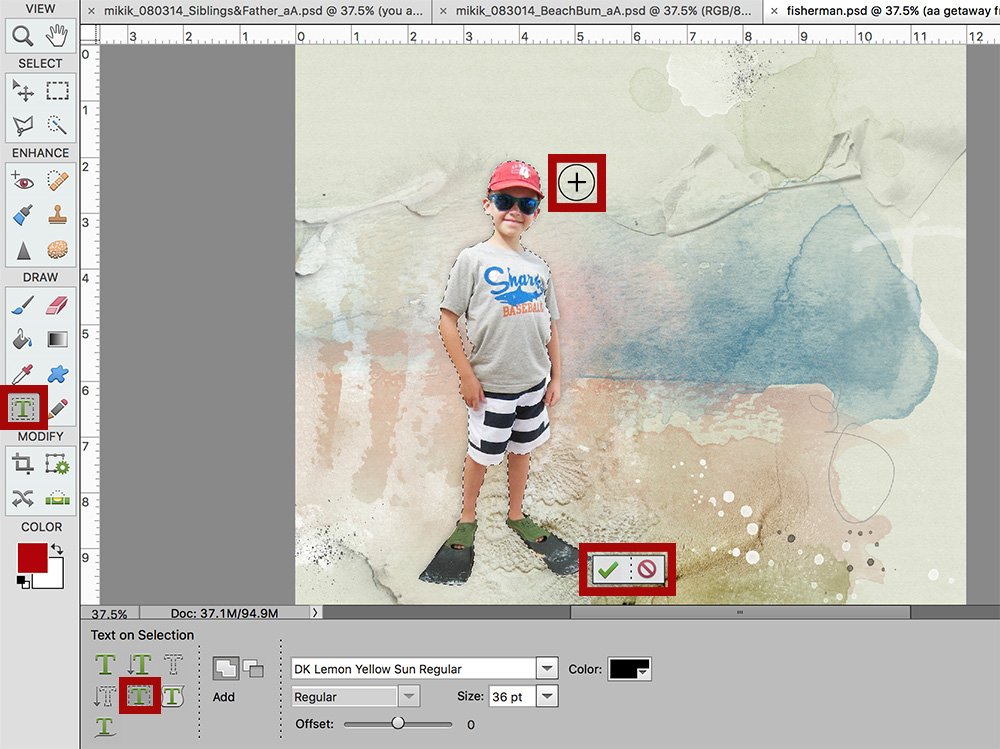
- You can adjust the size of your selection using the Offset slider.
- Confirm the selection to convert the dotted lines to a solid line called a Path.
- Repeat steps above for Text on a Shape.
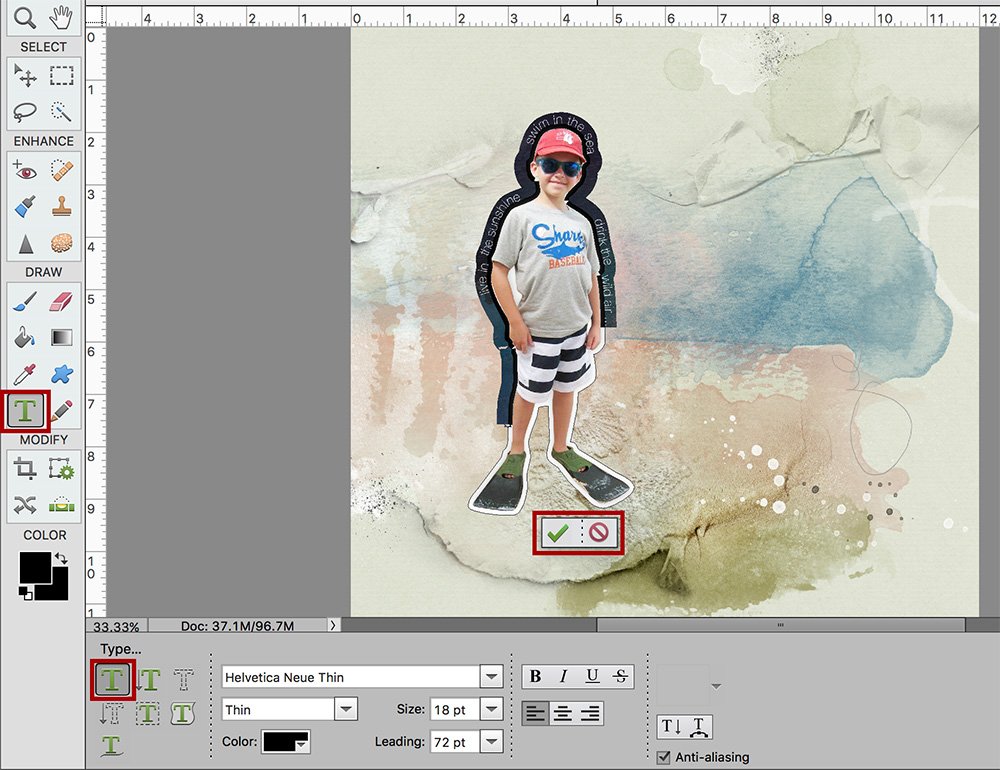
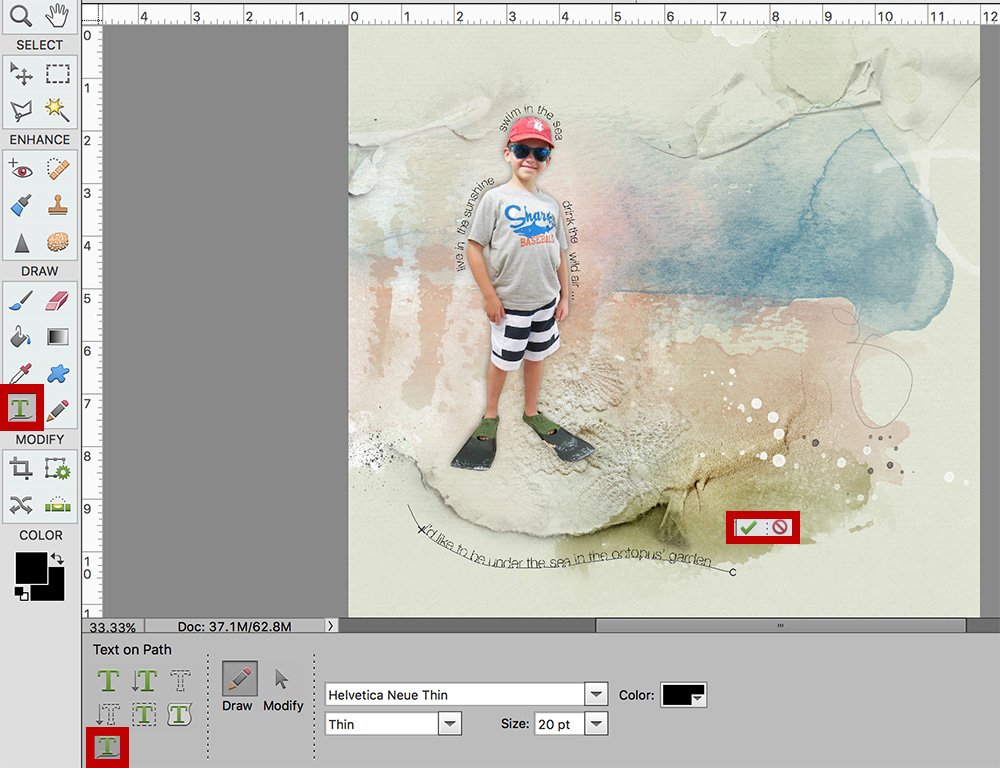
4. Text on a Custom Path
Create a custom path and add text so that it follows the outline of the shape.
- Select the Type Tool from the Tools Panel.
- Choose the Text on Custom Path option at the bottom of your screen.
- Draw a custom path over the image.
- You can commit/cancel the drawn path to redraw from the Options Bar.
- Select Modify in the Options Bar to refine or redraw the path.
- Use the nodes that appear on the path to modify it.
- Click the mouse at any point along the path to add text.
- Follow steps for Text on Shape or Selection.
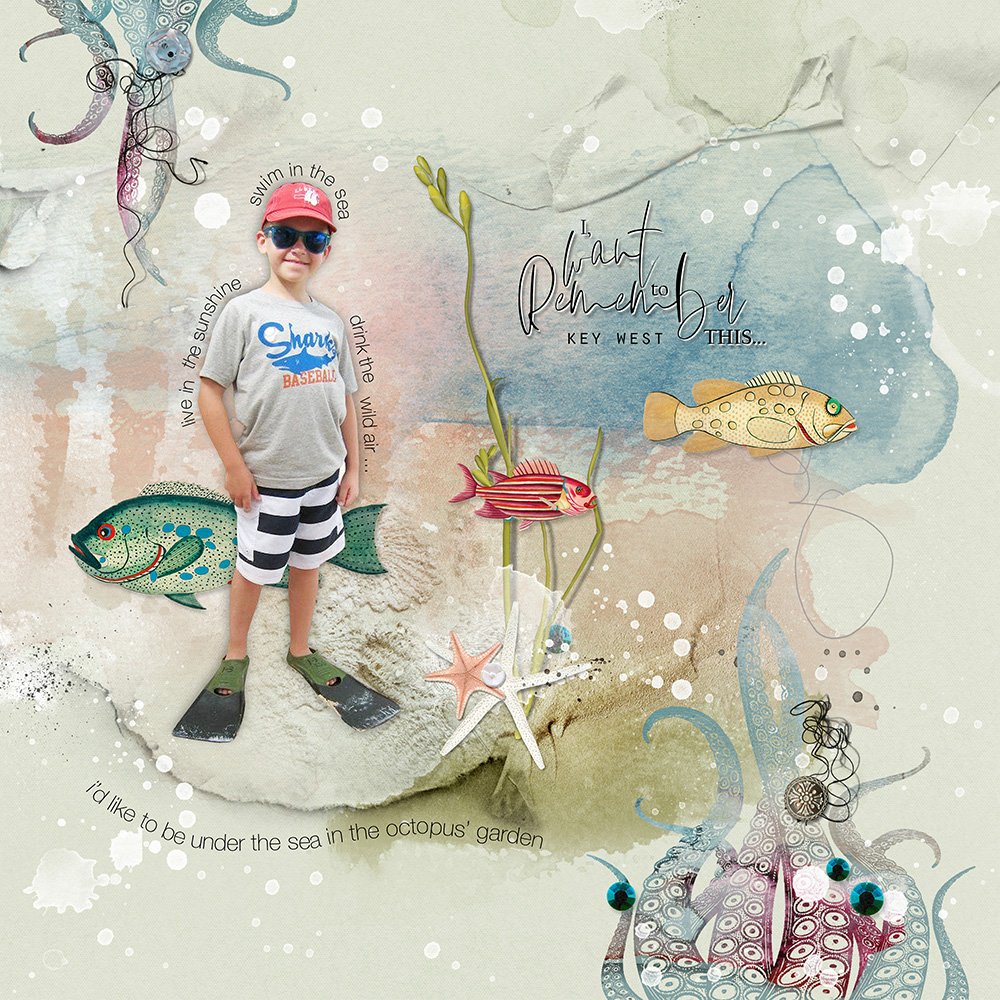
5. Embellish Layout
Add Brushes, WordART and Embellishments to complete your layout design.
 DigitalART Supplies
Summary
Photoshop Elements makes it easy to add text to shapes
- A picture says a thousand words, but the right photo with the right words can say a lot more.
- Adding text to your images creates visual interest in your layout design.
- Use creative text to better tell the story of your photos.
WE INVITE YOU TO:
- See this in video format for a limited time.
- Read Text on a Path for Photoshop.
- Peruse or post to the aA Gallery.
- Watch Fabulous Titles and Blending Modes.
- Visit the Anna Aspnes Designs store at Oscraps.


Huge cheers and gratitude for your generous instructional tutorial on alternative text placement features. Your detailed written and illustrative example instructions make it so much easier to understand and apply this wonder artistic feature available to us in Photoshop Elements. Thanks.
Happy you enjoyed the tutorial Pat.
Would you mind very much if I were to copy your Smells Like Dirt layout? We love gardening, and your words perfectly expresses how we feel at the end of a day.
I would be flattered! Gardening is one of my husband’s favorite pastimes. Would love to see your completed layout!
Delightful examples and walk-through of text on a path. Haven’t done this in a long time…needed a refresher! Miki, sure appreciate all the inspiration you bring to the aA community!
My sentiments exactly!
Thank you for this tutorial! I refer to it often! I love that I can add unique journaling to my designs!