

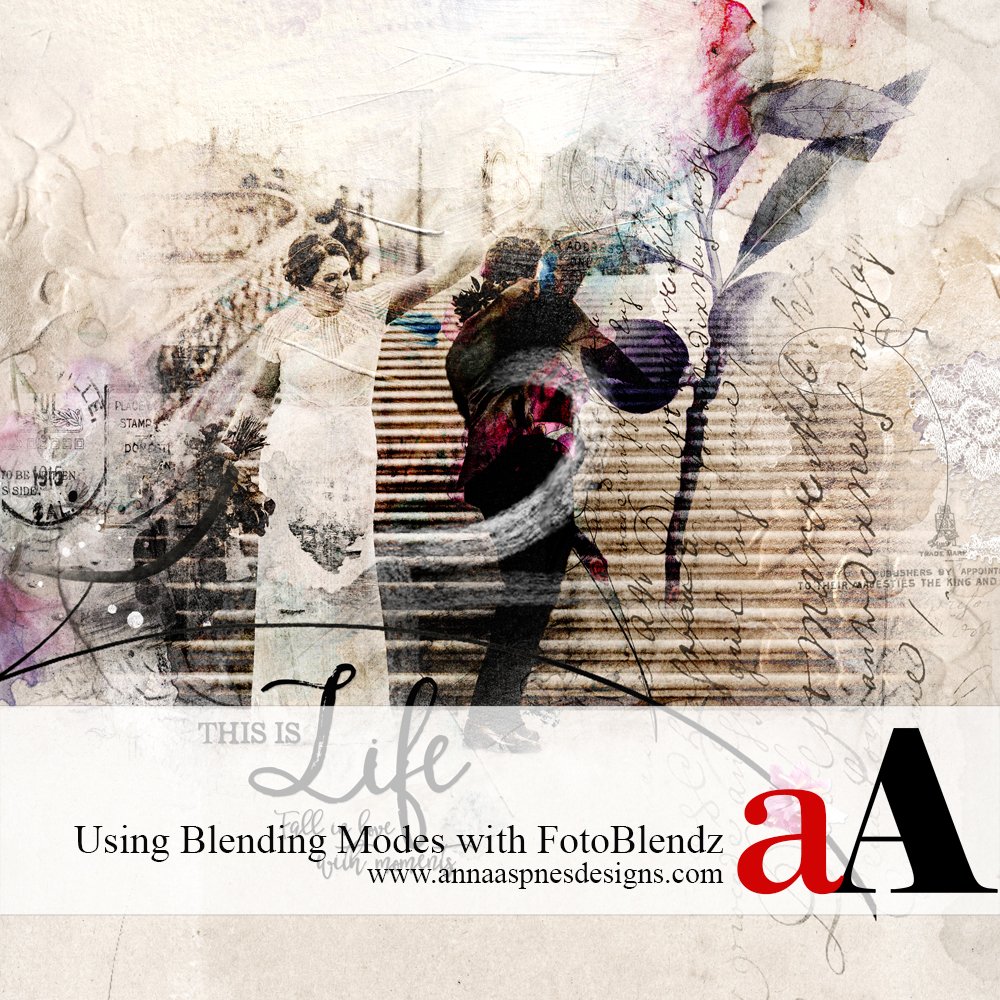
Today Creative Team Member, Laura is sharing her Using Blending Modes with FotoBlendz tutorial.
Follow this tutorial in Adobe Photoshop Elements.
Using Blending Modes with FotoBlendz
Here you will learn to convert your FotoBlendz clipping mask into a layer mask so that your photo will blend with the colors and textures of the artsy background underneath the FotoBlendz instead of with the dark FotoBlendz itself.
What happens when you clip a photo to a FotoBlendz mask and then apply Color Burn Blend Mode to the photo is that the photo interacts with what’s directly below it–the mask–and not with the artsy background below. This produces a black blob, not a fun effect. But by converting the FotoBlendz to a layer mask you can have your cake and eat it too. Your photo will both conform to the shape of the mask AND interact with the underlying artsy background when Color Burn Blend Mode is applied.

Using Blending Modes with FotoBlendz
Choose a Background and Clipping Mask
Open your supplies and drag them onto your canvas. This layout use Artsy Paper 1 from the ArtPlay Palette Sashay and Camera FotoBlendz No. 1_6.

Add Your Photo
Drag your photo on top of the FotoBlendz, resizing the FotoBlendz as needed by pulling on the handles at the corners or sides of the mask. Clip your photo to the FotoBlendz using CTRL/CMD + ALT/OPT + G (Photoshop CC + Elements 15+) = CTRL/CMD + G (Elements).
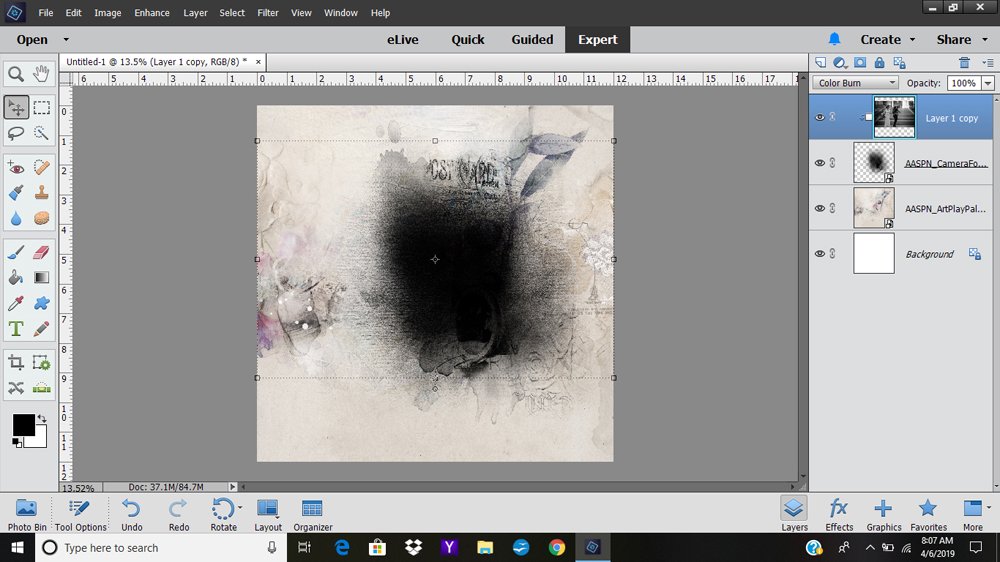
Here is what happens when you select Color Burn Blending Mode from the Blending Options at the top of the Layers Panel.
Note how the photo blends with the dark FotoBlendz and not the pretty artsy background.

Convert the FotoBlendz to a Layer Mask
To proceed, if you have clipped your photo to the FotoBlendz, you will have to Unclip it by right-clicking on the layer and selecting Release Clipping Mask from the pop-up menu. Leave the Color Burn Blending Mode on. Turn off the visibility of the FotoBlendz by clicking the eyeball to the left of the layer, then make sure the photo layer is highlighted.

Create a Selection around the Fotoblendz by Control/Command-Clicking the thumbnail icon of the Fotoblendz (not the label). A line of marching ants will encircle the Fotoblendz.

Check that your photo is still highlighted. Then add a layer mask by clicking on the Add Layer Mask icon in the bar at the top of the layers panel. And voilà your photo will now blend with the artistry layer rather than with the FotoBlendz.

Summary
Repeat this process as many times as necessary to blend your photo into the background as desired. You may use the same FotoBlendz with duplicates of your photo, or, as I did, select different FotoBlendz. You’ll find a wide variety of clipping masks available in the aA store here.
If you liked this Using Blending Modes with FotoBlendz tutorial, please consider sharing it using the social media buttons below.


would be great to have this as a pdf – is that possible?
Hi Elizabeth, you can copy and paste into a word document and then print 🙂
This is a wonderful tip Laura, and I look forward to trying it soon. Thank you!
Yes!
Clear, user-friendly directions, Laura! Fantastic results…adore this delightful photo and wedding celebration page enriched with your blending approach! Thanks!
Yes!
Anna,
What is the difference between using a clipping mask versus this tutorial of turning the clipping mask aka fotoblenz mask into a layer mask?
Thank you in advance
Karen
Hi Karen, it’s just an alternative method of working with the FotoBlendz series.
I have to use this method a lot as GIMP doesn’t do Clipping Masks.